Authorize.net login credentials are not the same credentials used to integrate with SalesPro. To connect your account you will need the API Login ID and the Transaction Key.
API Login ID and Transaction Key
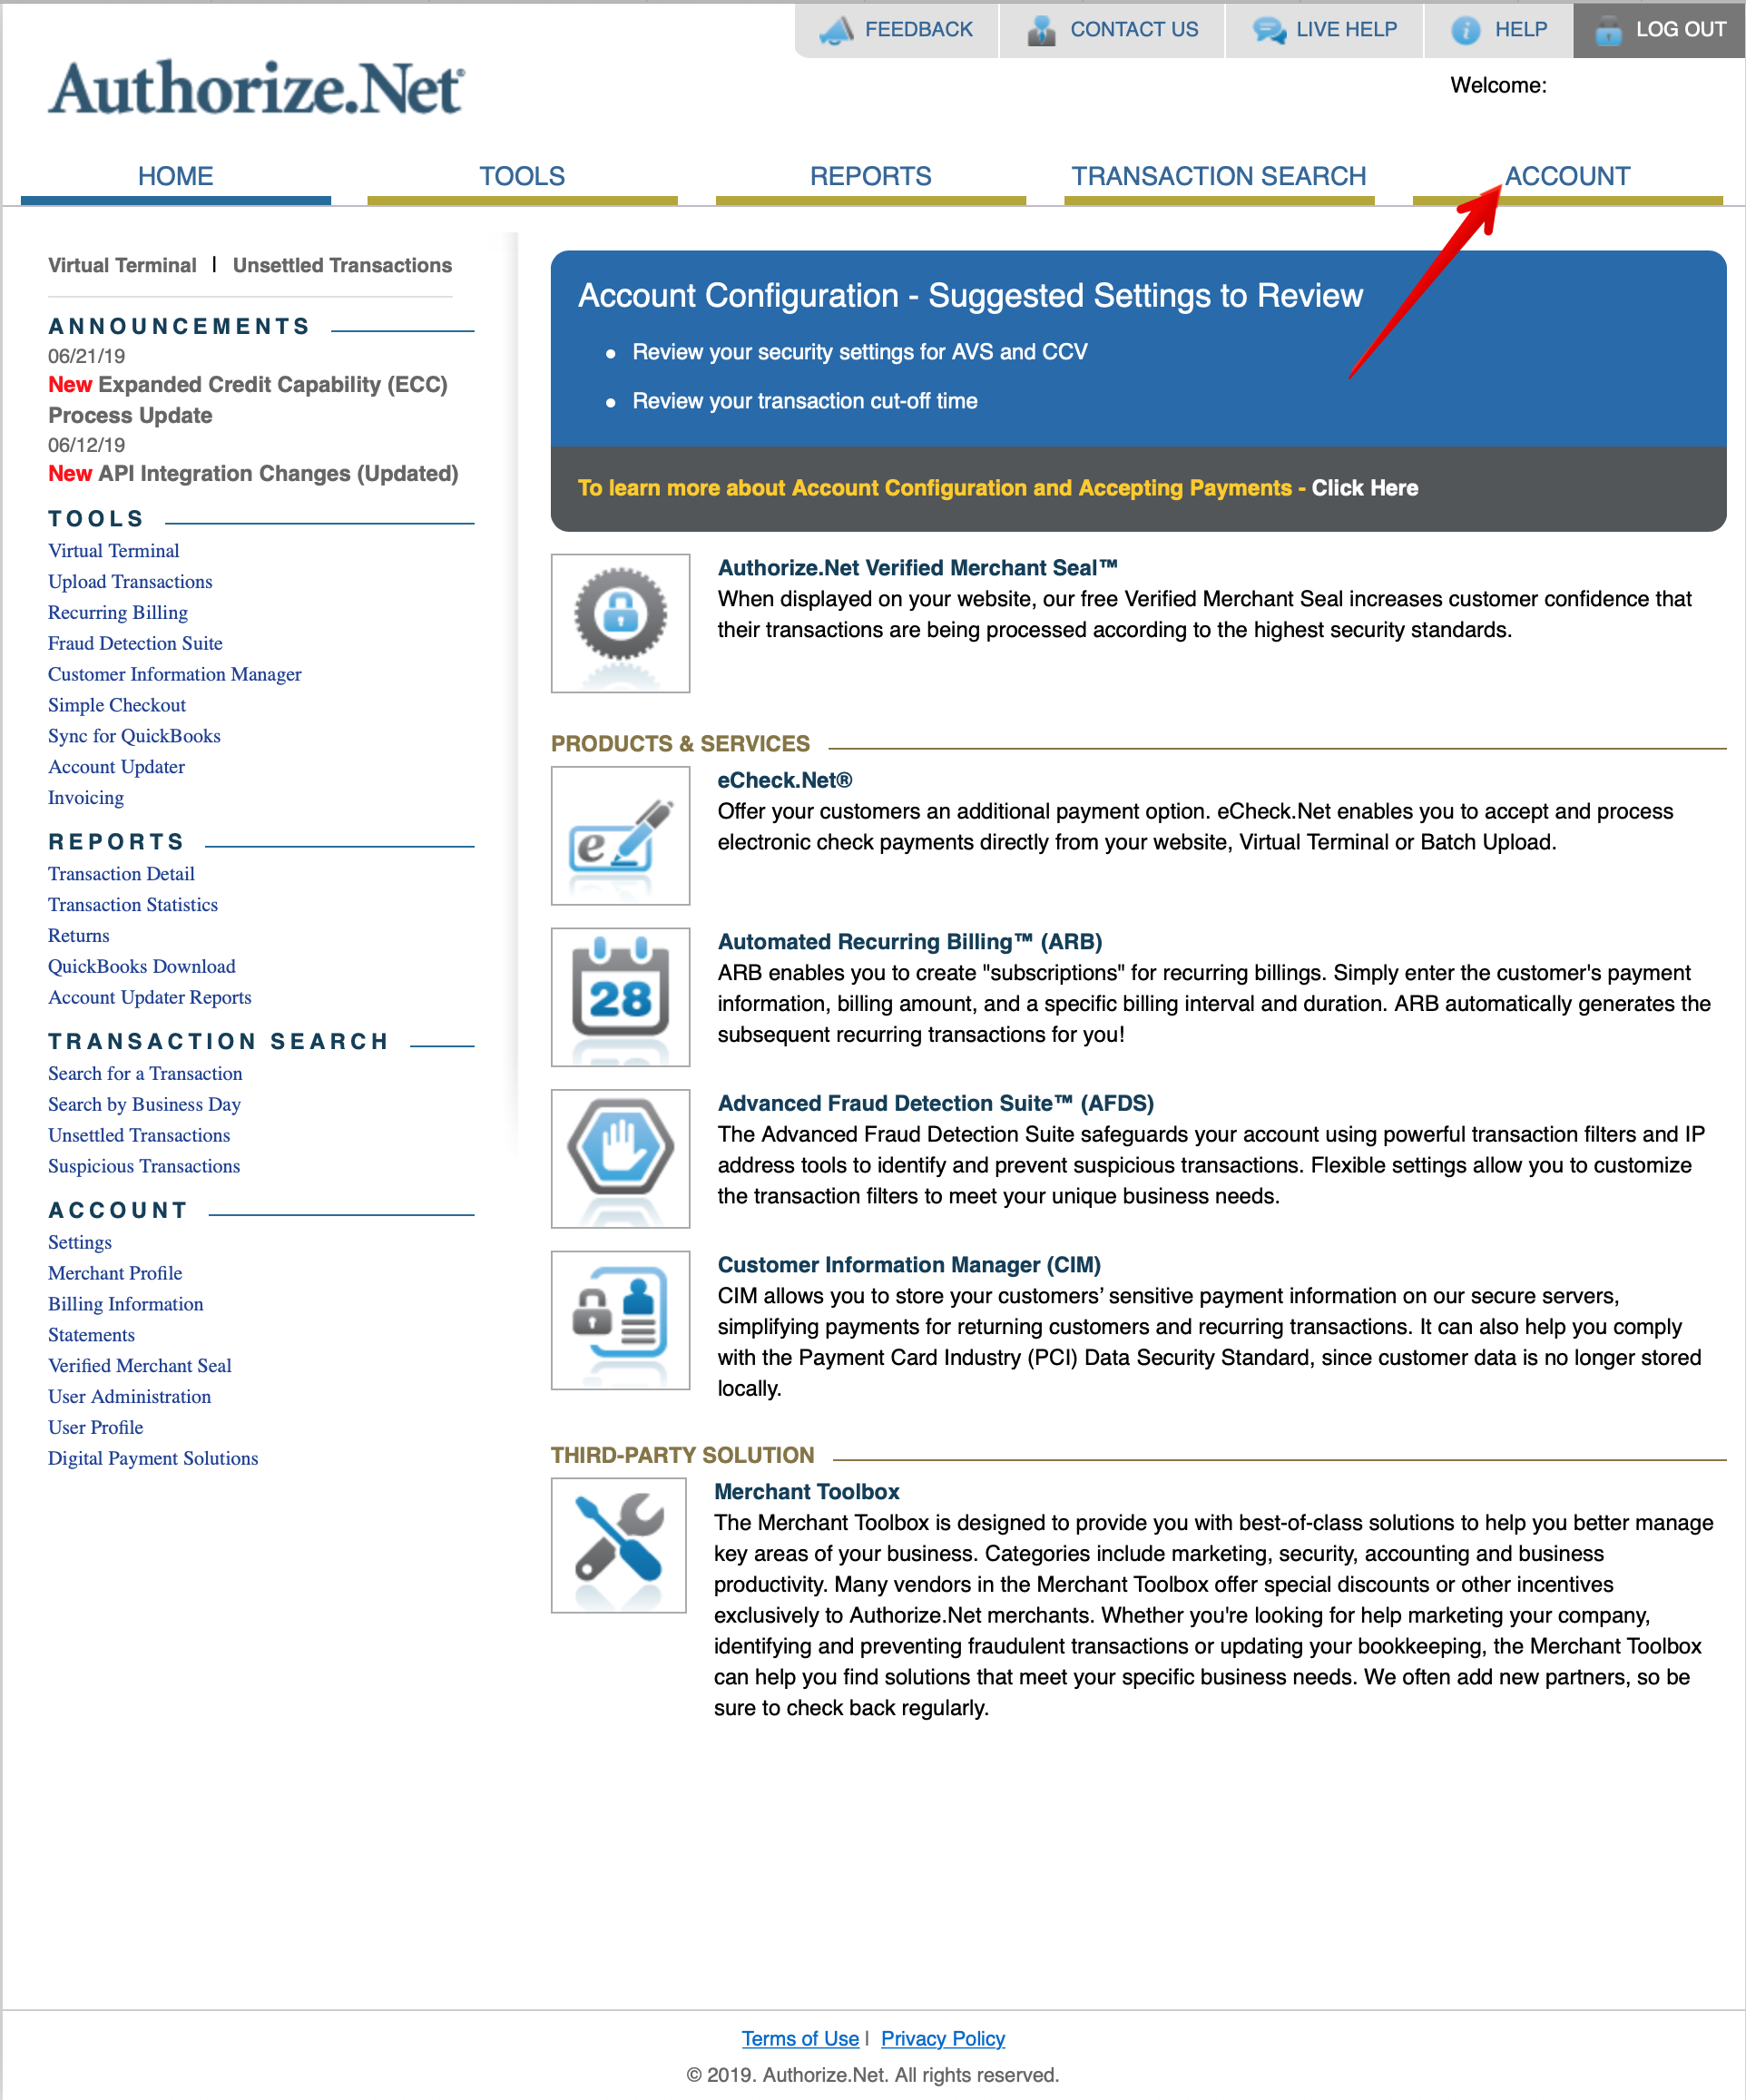
- Log into the Merchant Interface.
- Click Account from the main toolbar.
- Click Settings in the main left-side menu.
- Click API Credentials & Keys.
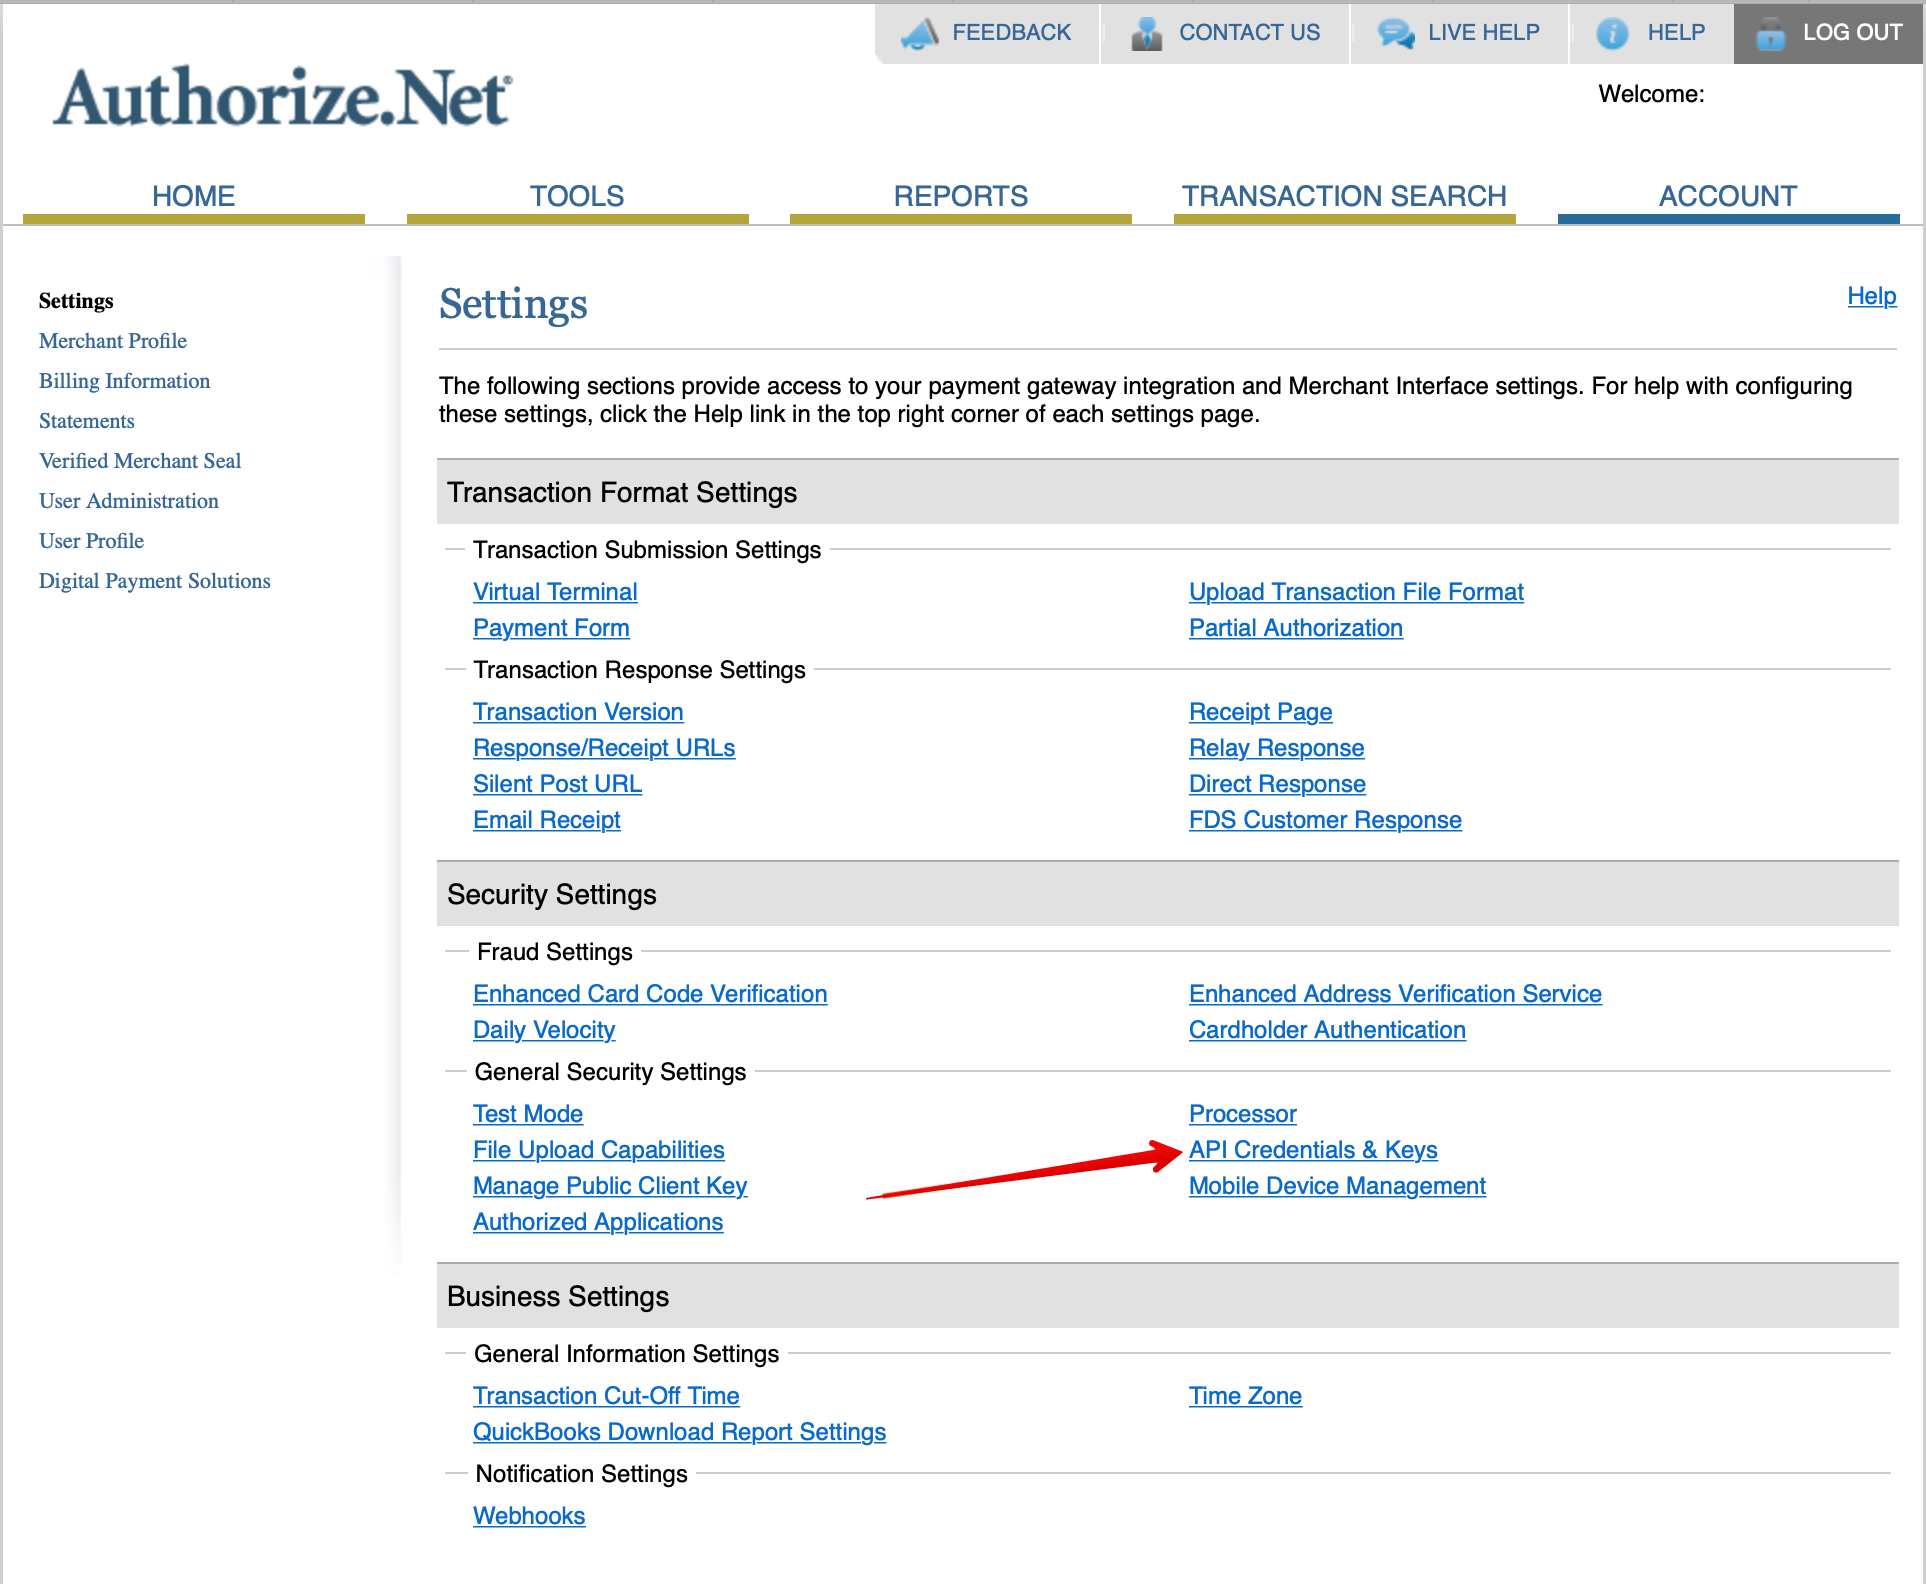
- Here you will see the API Login ID. If you do not see the API Login ID this means it has never been generated. Selecting New Transaction Key will also generate the initial API Login ID.
- Select New Transaction Key.
- Click Submit to continue.
- Request and enter PIN for verification.
- Your new Transaction Key is displayed.

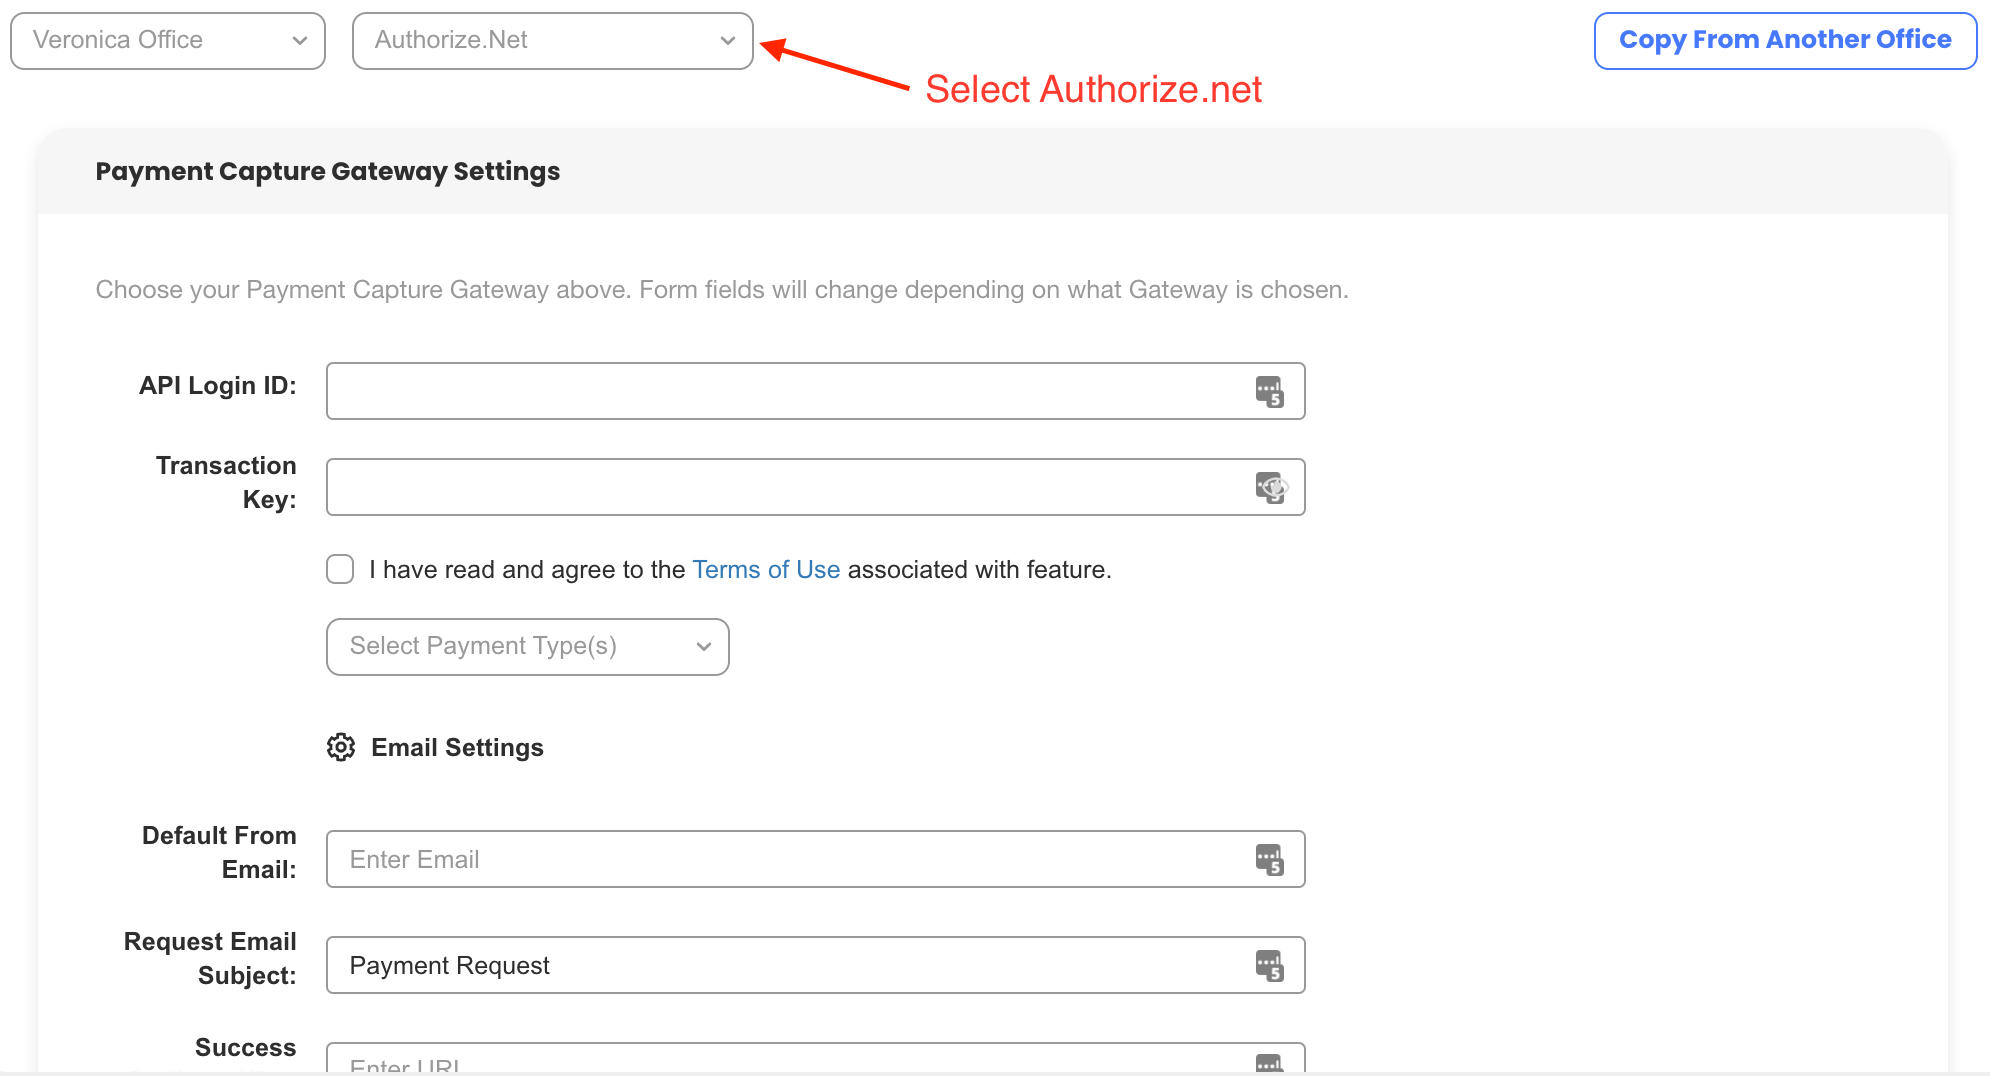
SalesPro Integration Connection
- In SalesPro click Finance > Payment Capture.
- Select Authorize.Net as the Gateway.
- Enter the API Login ID.
- Enter the Transaction Key.
- Check I have read and agree to the Terms of Use associated with this feature.
- Click Save.