SalesPro offers the ability to create configurable documents for your company. There are several different document types. Contracts and Proposals are the default document types already defined in SalesPro.
You can also define your own document types (such as Work Orders, Production Documents) in Documents > Custom Documents. Each of these document types are created and edited in the same way. Additionally, each of these document types can have different sending rules. For example you may want contracts and proposals written back to the CRM and emailed to the customer. Conversely, you may want work orders written back to the CRM, but not emailed to the customer. This section outlines the steps for creating and editing all document types.
Accessing Documents
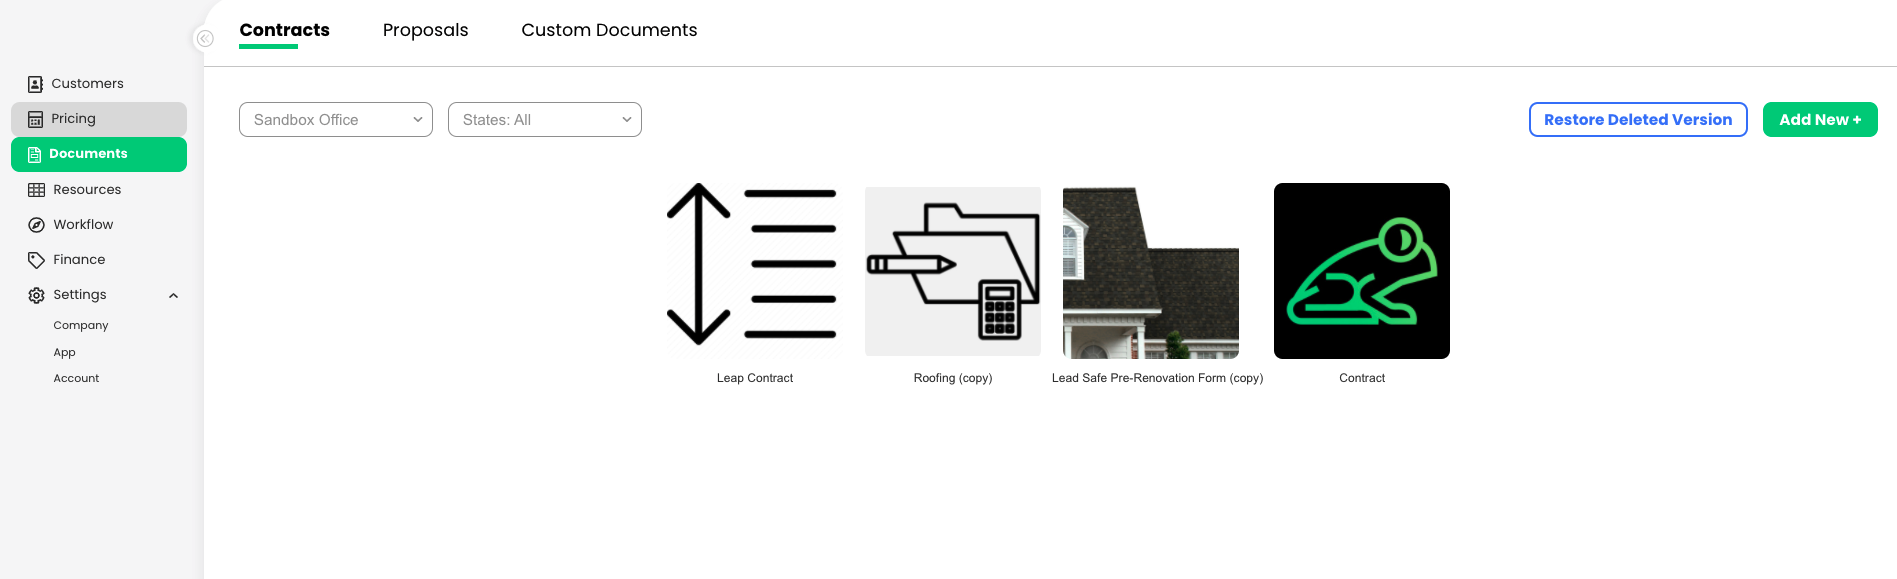
- From the SalesPro Admin Dashboard, click Documents.
- From the Documents page, click the tab with the name of the document type you would like to access (Contracts, Proposals, or Custom Documents).
Adding & Managing Documents
To add or manage your documents, follow these quick steps.
- Access the Documents section and select the document type you would like to manage.
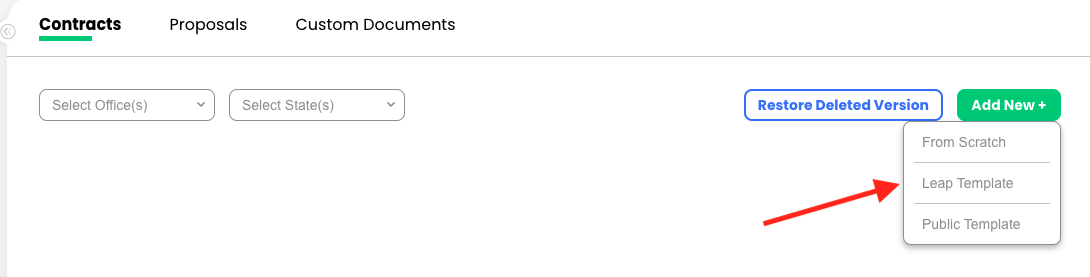
- Click the Add New button.
- Select from Scratch, SalesPro Template, or Public Template to create a new document. If you would like to manage an existing document, use the quick actions menu that appears when you hover over an existing document.
SalesPro offers a number of prebuilt templates to help you get started.
| Name | Icon | Description |
|---|---|---|
| Edit | Edit a document | |
| Copy | Make a duplicate copy of the document | |
| Delete | Delete the document | |
| Publish | Publish the document to the public library to share with others |
Editing a Document
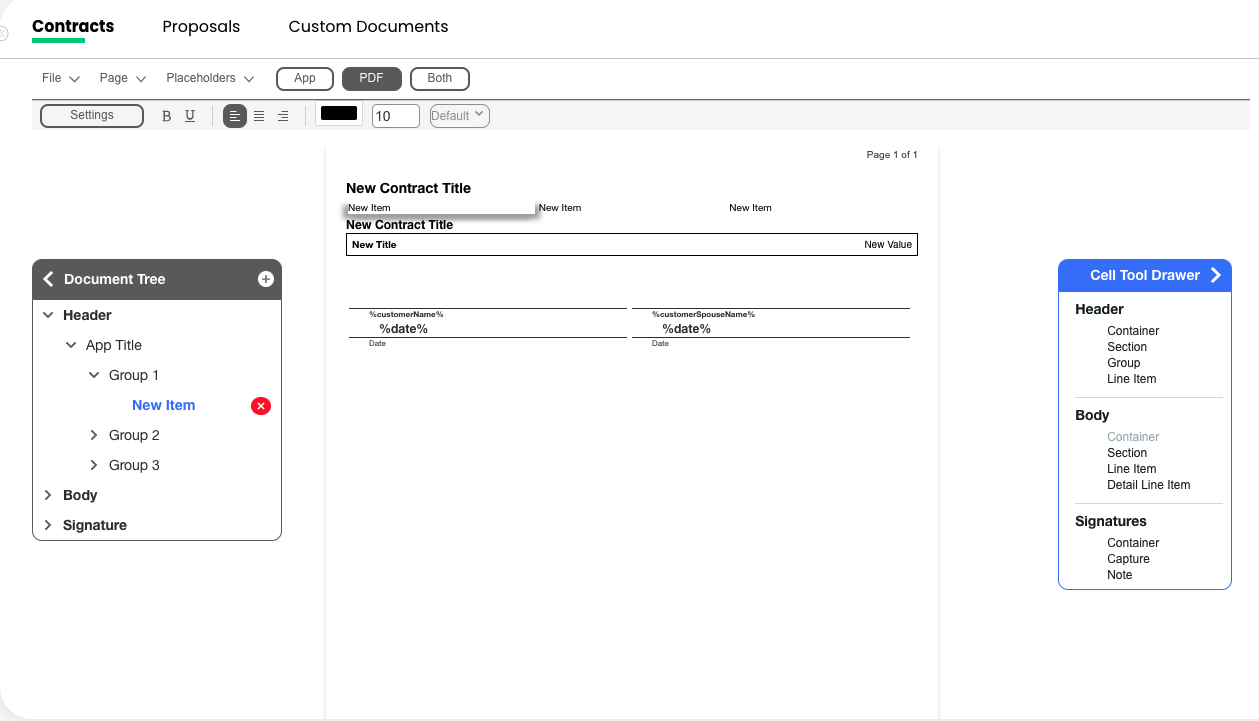
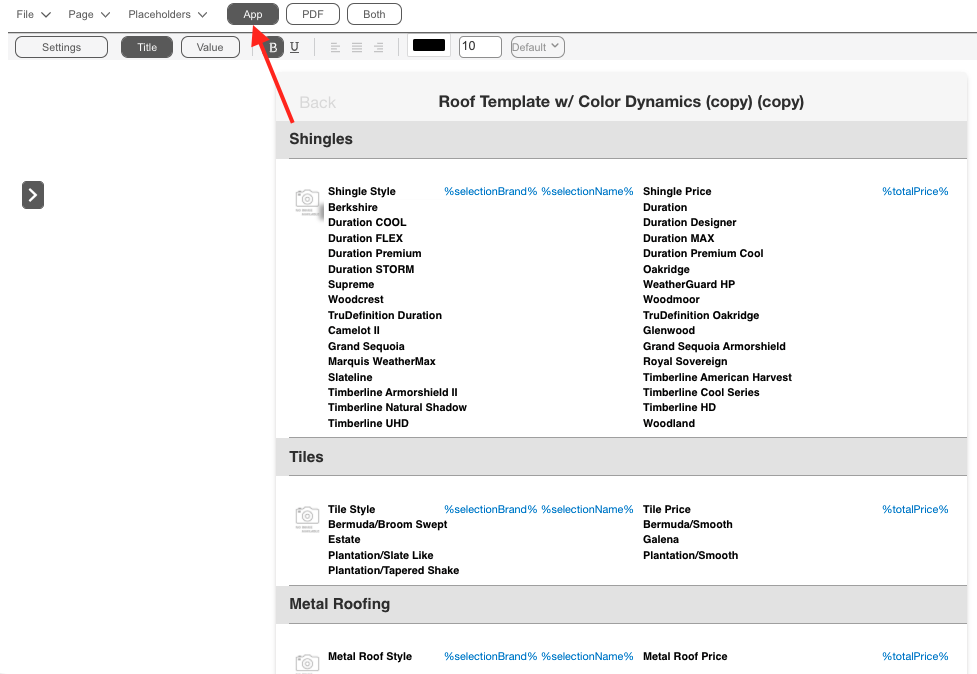
The image below displays the user interface for contract editing based off of a template created from scratch. From this screen, you can expand the Document Tree using the arrow on the left side of the contract editor while you can expand the Cell Tool Drawer using the arrow on the right side of the contract editor.
Editor Menus
File Menu
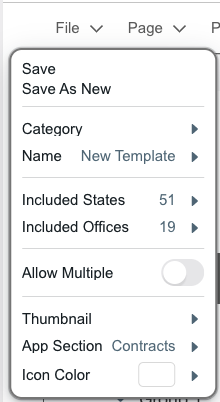
The file menu contains the general template settings such as the category, name, and the included office(s) and state(s) of the template. This is also where you save any changes made while working on the template.
| Menu Item | Description |
|---|---|
| Save | Saves all the changes made to the file. SalesPro will not automatically save your data unless the Save icon is clicked. |
| Save As New | Allows you to save as new copy instead of overwriting the document. |
| Category | The Category the contract will be grouped under (windows, doors, etc.). Note: These appear in alphabetical order. |
| Name | Name of the document that displays on the iPad. |
| Included States | The states that the document is available in. SalesPro will filter the documents based on which state is entered into the customer address inside of the app. |
| Included Offices | The offices the template shall appear under. SalesPro will filter the documents based on which office the sales rep is located in. |
| Allow Multiple | This allows the document to be created multiple times for a single estimate. |
| Thumbnail | Allows you to upload an Icon for that contract which displays on the iPad. |
| App Section | Allows you to select a section on the application for your document to be displayed. |
| Icon Color | Allows you to fill the icon with the specified color. Uploading a thumbnail will be placed on top of the color selected. |
Page Menu
The page menu gives you generic page settings including margins, page type etc.
| Menu Item | Description |
|---|---|
| Page Type | You can choose from two different page types in SalesPro: Default: Most commonly used document in SalesPro. Use this type of page if your document will require any kind of input from the user including signatures. PDF: Use this type of page when you want to add an already made PDF document as a template. These pages will not be editable to the user and only added as additional pages to the final document created. This is good for pages such as terms and conditions that do not require any changes from the user. |
| Page Size | Allows you to specify your contract page size. |
| Watermark | Allows you to upload a custom watermark to your document or to use your watermark that has been uploaded under App Settings > Watermark. |
| Photos Per Page | Allows you to select how many photos appear on each page of the document. |
| Left/Right Margins | Adjust left or right margins of the document. |
| Top/Bottom Margins | Adjust top or bottom margins of the document. |
The page menu gives you generic page settings including margins, page type etc.
Placeholders Menu
Placeholders are merge fields you can add in the contract to bring information over from the Estimate.
| Values | Display what information you are bringing over from the estimates screen. |
| Plaeeholders | Displays merge field that needs to be added to the document to bring information over. You can click on the placeholder to copy then edit your cell to paste. |
Editor Display
App View
Allows you to view the input screen of the document. This is very similar to what the Sales reps will see when they are filling out a document. This view will only display the fields that are fillable in the document.
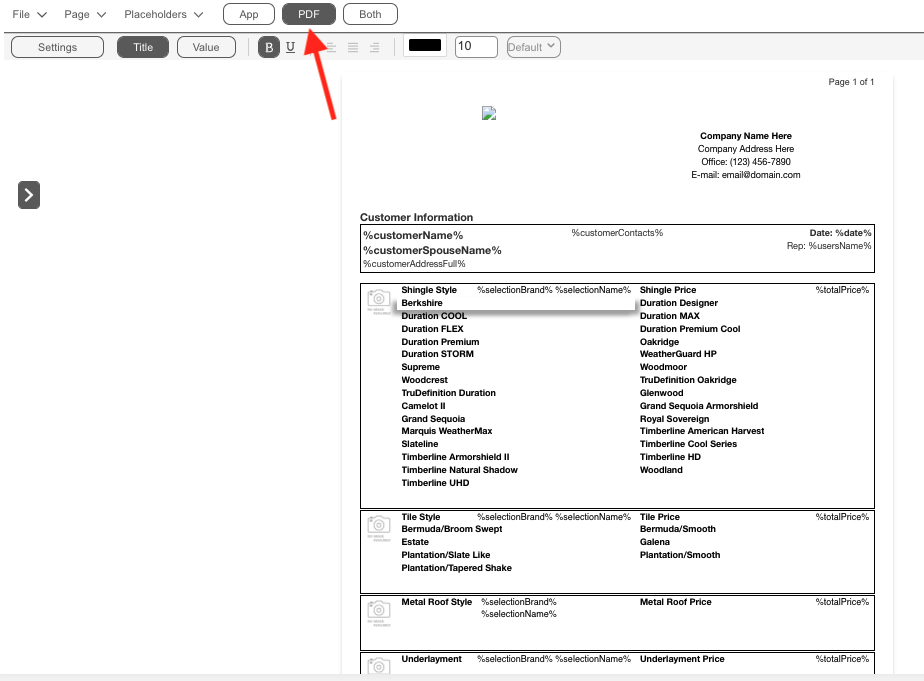
PDF View
Allows you to view the PDF version of the document which be sent to the customer. This is very similar to what the generated PDF document will look like on the iPad once the sales reps have completed all inputs.
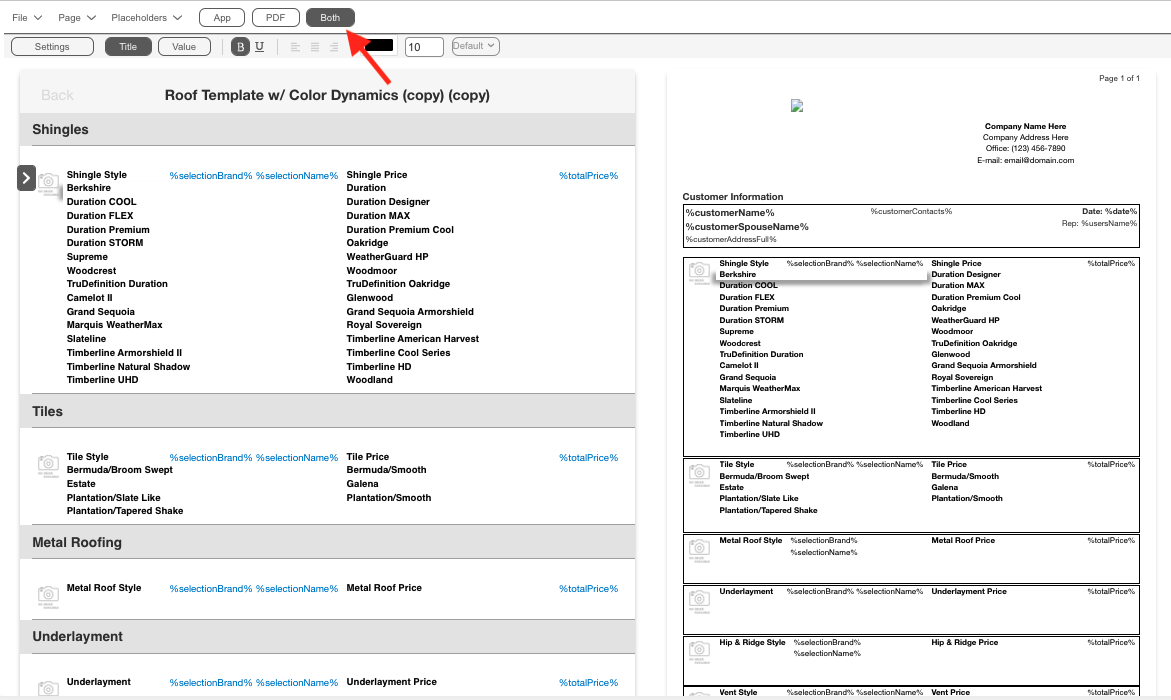
Both
Allows you to see both PDF and App version of the documents when making edits.
Tools
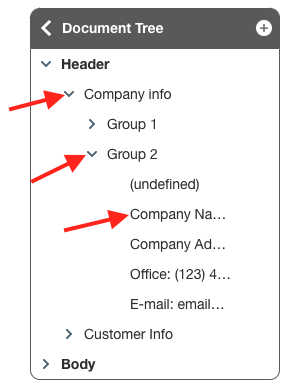
Document Tree
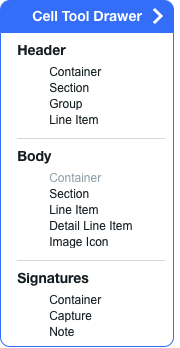
The Document Tree can be used to view everything that is included in your document to allow for easier editing. The Document Tree consists of Header(s), a Body Section and Signature Sections. Clicking on sections and cells in the document will highlight the corresponding item in your document tree. Drop Down arrows allows you to expand and view all the items within.
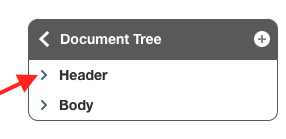
Header container Drop down allows you to see a Section, Group and Line Item.
Cell Tool Drawer
The Cell Tool Drawer allows you to drag and drop different elements onto your documents. Simply click and hold to drag sections and cells onto the page.