This section allows you to create custom Document sections (ex. Production Documents, Survey, Work Orders, etc). This gives you the flexibility to set sending rules different from Contracts and Proposals.
Quick Steps
- Create a custom Document Type.
- Set up Document Type Sending Settings.
- Create/save documents under that Document Type.
Create a Document Type
This section will have to be set up separately for each office.
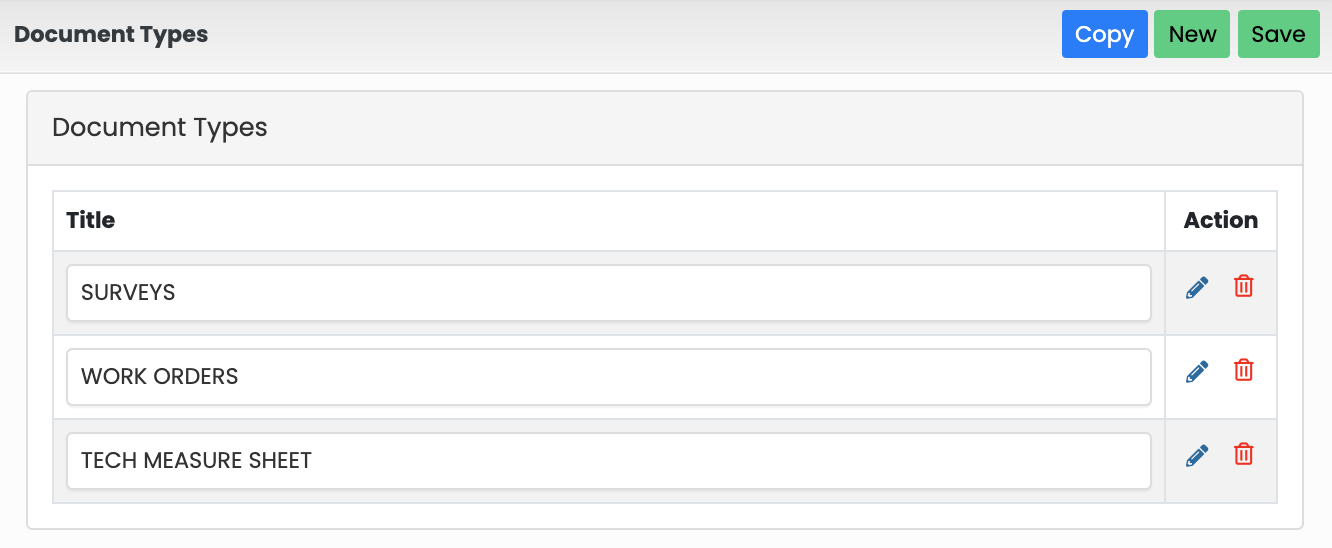
- In your SalesPro Dashboard, navigate to App Settings > Document Types.
- Click
 to create a new Document Type.
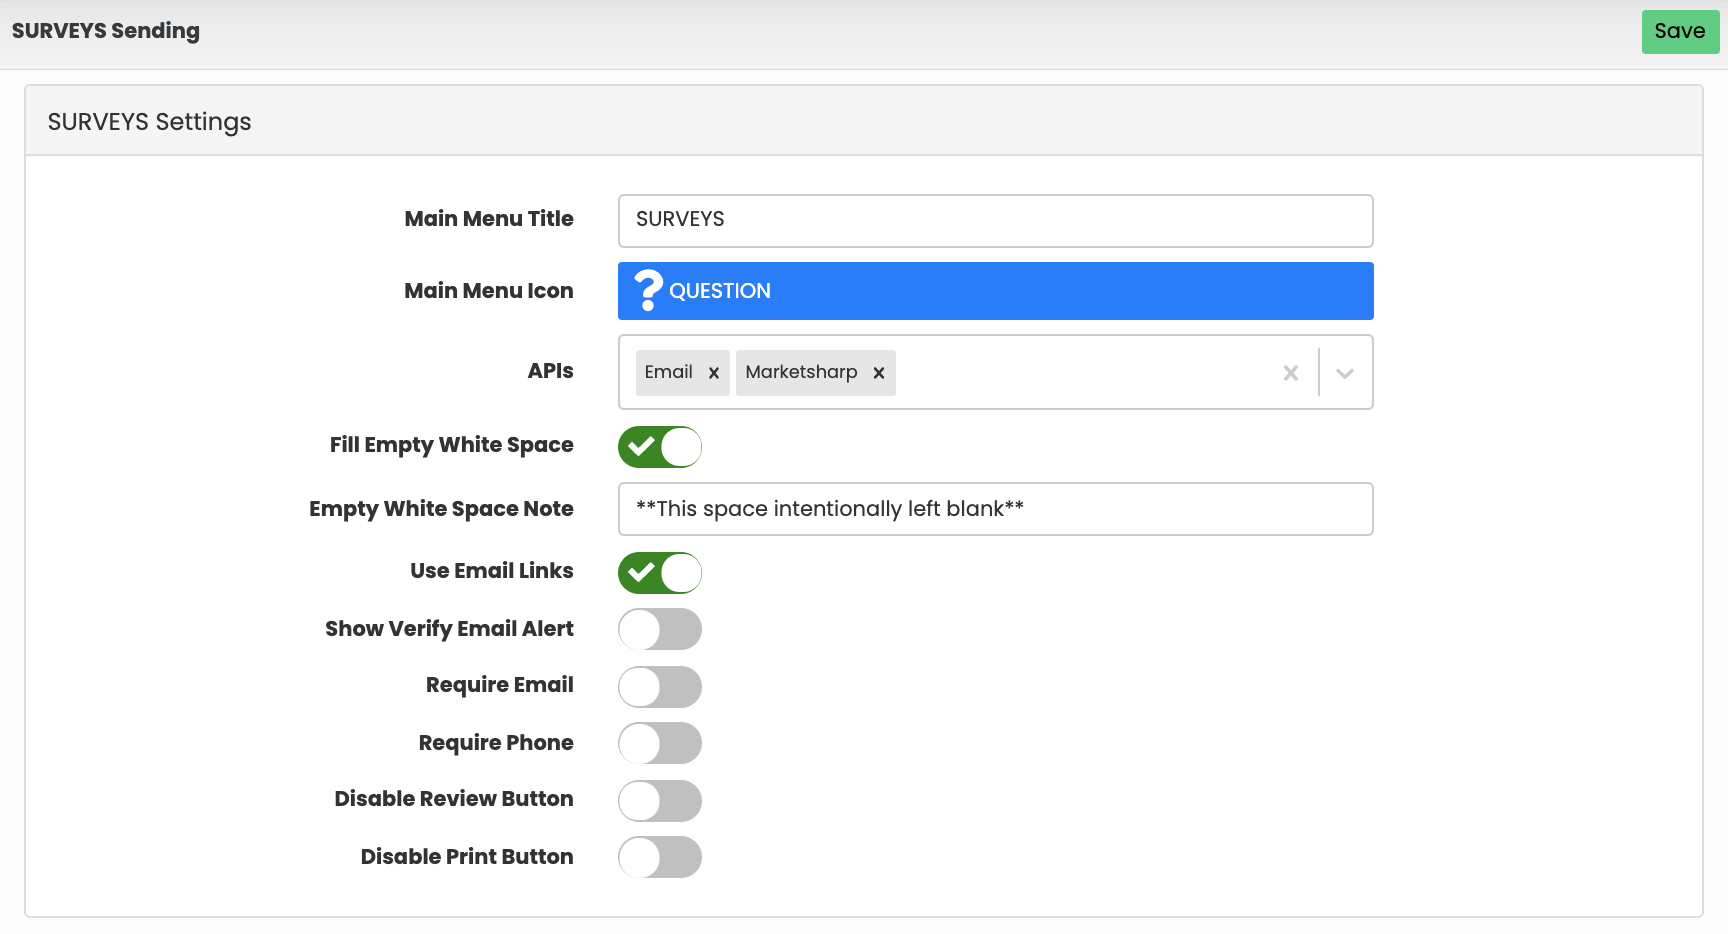
 - Create a Main Menu Title for that Document Type.
- Select a Main Menu Icon that will appear next to the Menu Title.
- Select your APIs. This will tell SalesPro where it should send the contract.
- Toggle on any settings you would like to apply when sending out a custom Document.
- Hit Save.
Document Sending Settings
Use this section to define the default settings for emailing custom document types. For this section to appear, you must select the Email API option from the drop down.
You can populate any field in this section with placeholders, such as Customer Name, Customer Email, User Email, etc.
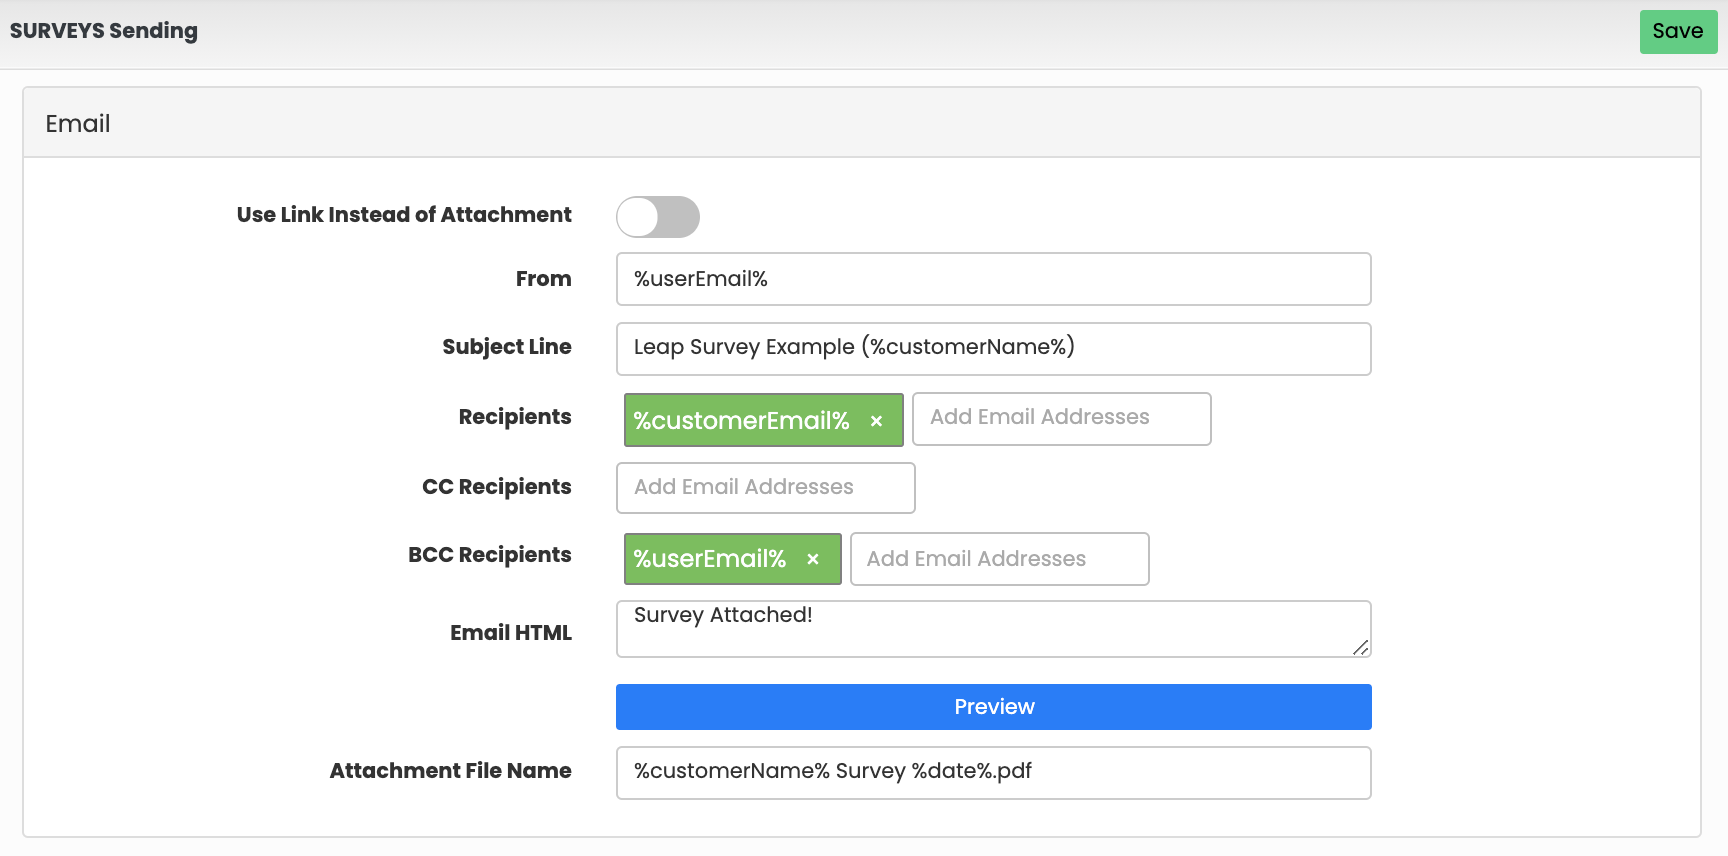
- Use Link Instead Of Attachment
- Provides a link to the document within the body of the email rather than attaching the document to the email.
- From
- The address from which you want all contracts emailed.
- Subject Line
- The subject line you want for all your contract emails to use.
- Recipients
- Email addresses to which you want all contracts sent.
- CC Recipients
- Email addresses to which you want all contracts emails carbon copied.
- BCC Recipients
- Email addresses to which you want all contract emails blind carbon copied.
- Email HTML
- The HTML body of all emails sent from the contract section of the app. Your website designer should be able to create one of these documents or you can use a free online HTML text editor to generate your email template.
- Attachment File Name
- The name of the PDF attachment sent with the email.
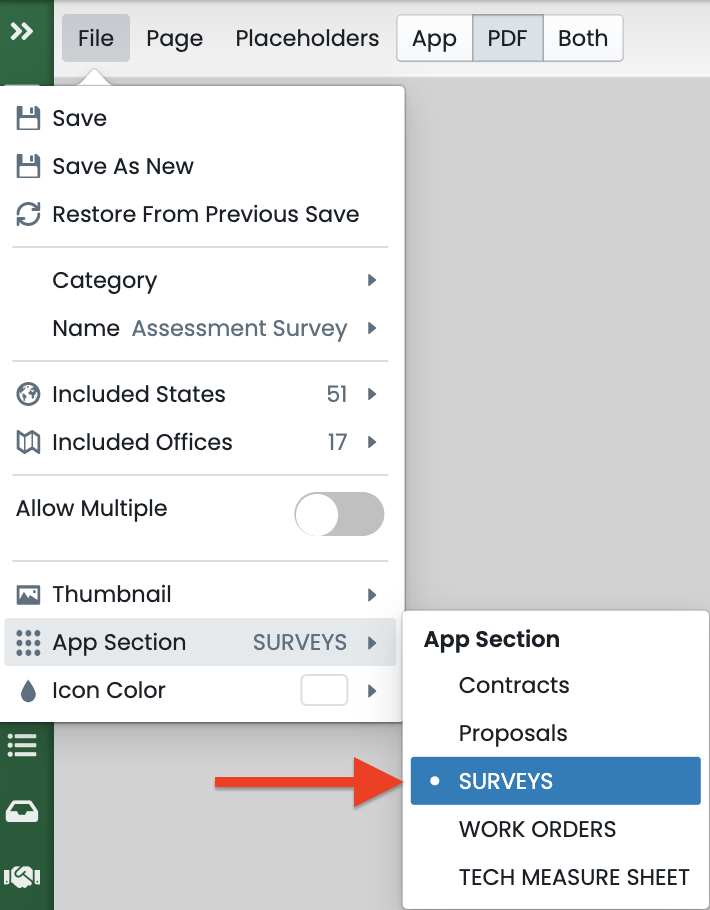
Save Documents in Custom Section
To save a document in a custom section:- Open the document to edit.
- Click File on the top left-hand corner of the editor.
- Navigate to App Section.
- Pick the Document Type you want to save the document in.