DocuSign allows contracts, proposals, and other documents to be sent to the customer remotely. DocuSign requires one Business Pro license. If you do not have a license you can purchase one via the DocuSign website.
Quick Steps
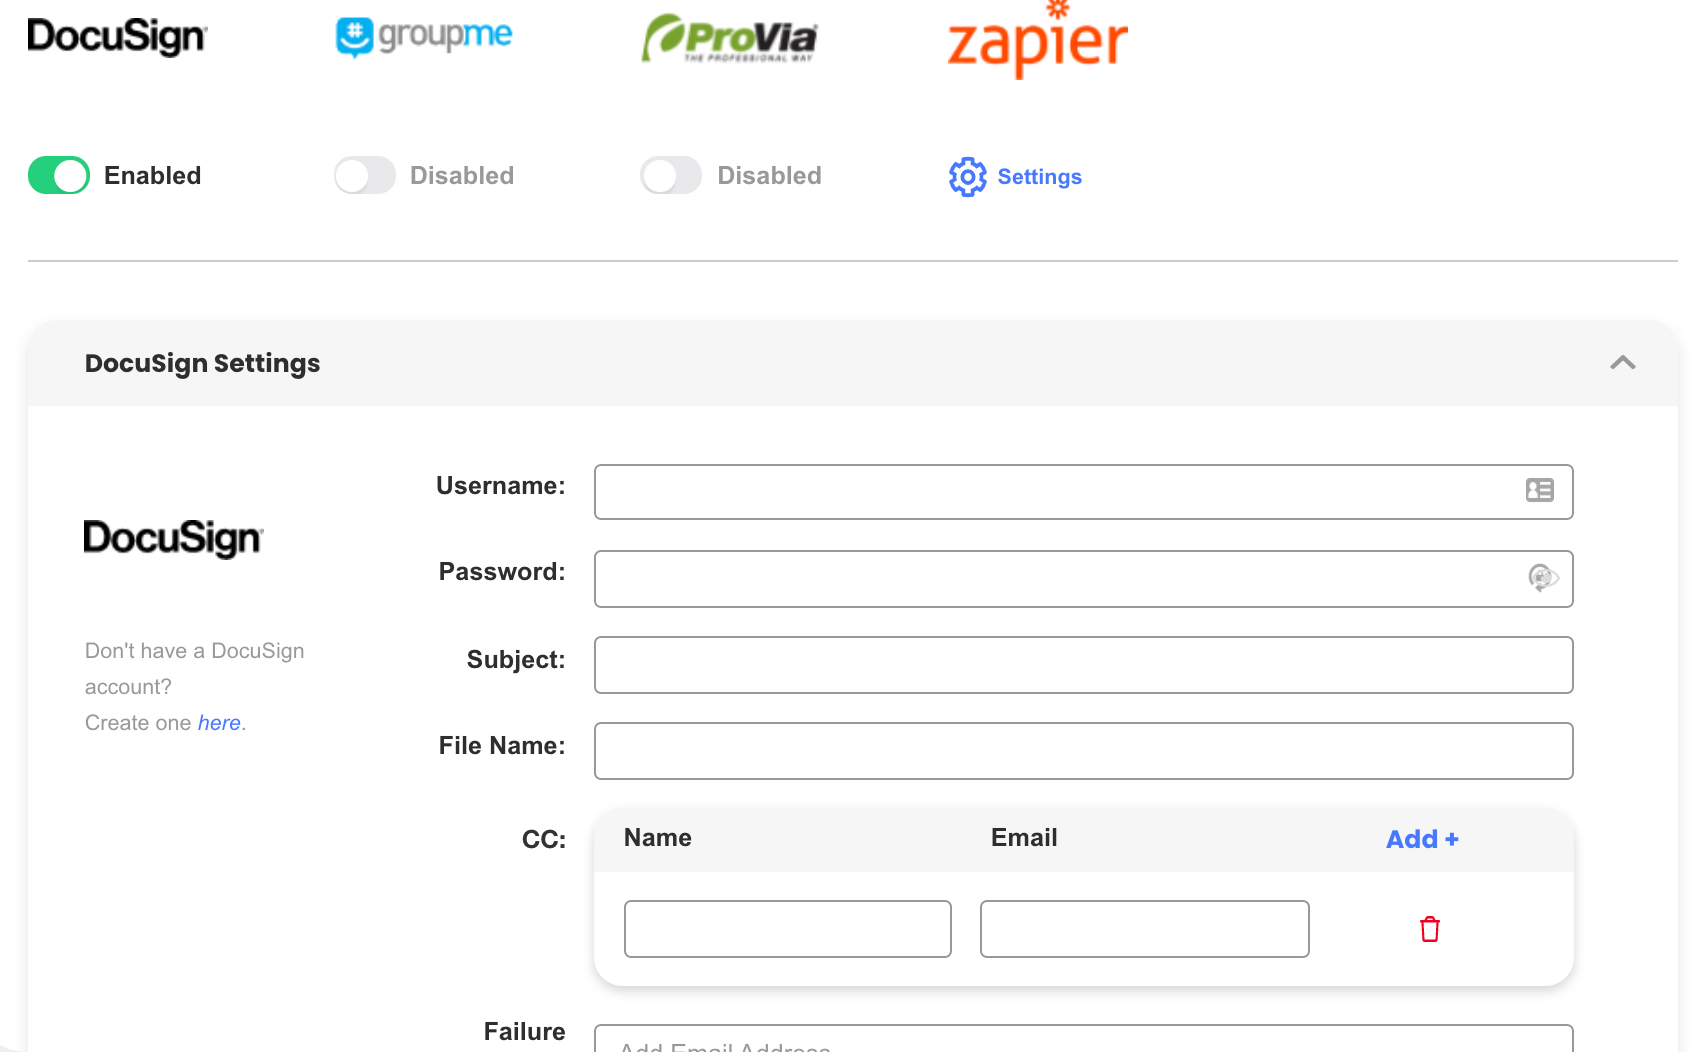
- Click Settings > Company > Integrations.
- Switch on the Docusign Enabled toggle switch.
- Enter your DocuSign username and password.
- Enter a Subject for the DocuSign email. This will be the subject of the email the customer receives.
- Enter a File Name.
- Enter CC recipients. These will be the email addresses of anyone that would need to receive a copy of each DocuSign email.
- Enter at least one Failure Recipient. This contact will be emailed in the event that the DocuSign fails to go through.
- Check the I have read and agree to the Terms of Use associated with this feature. box.
Using DocuSign
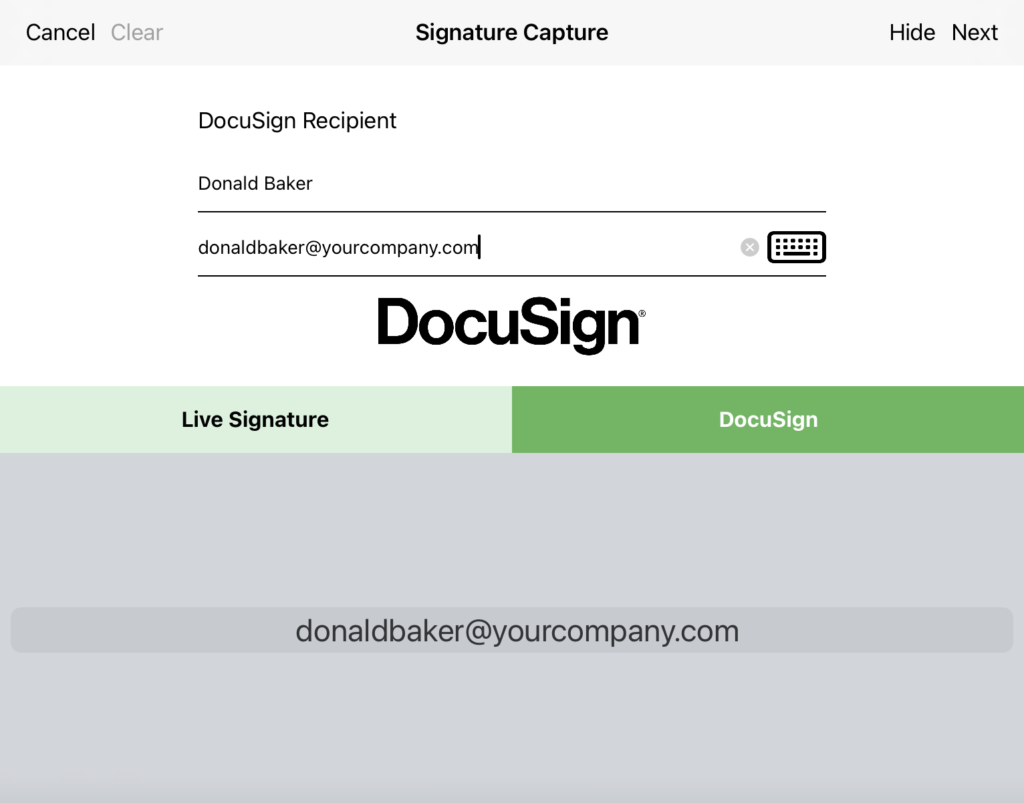
Using DocuSign is as simple as generating a contract and hitting the sign button. There will be a DocuSign button on the bottom right of each Signature Capture. This allows individual signatures to be sent via DocuSign to different email addresses. This also provides the ability to sign a signature directly on the iPad and sign a signature with DocuSign on the same document. (Example: The main signer is available to sign in person, but the cosigner is not.)
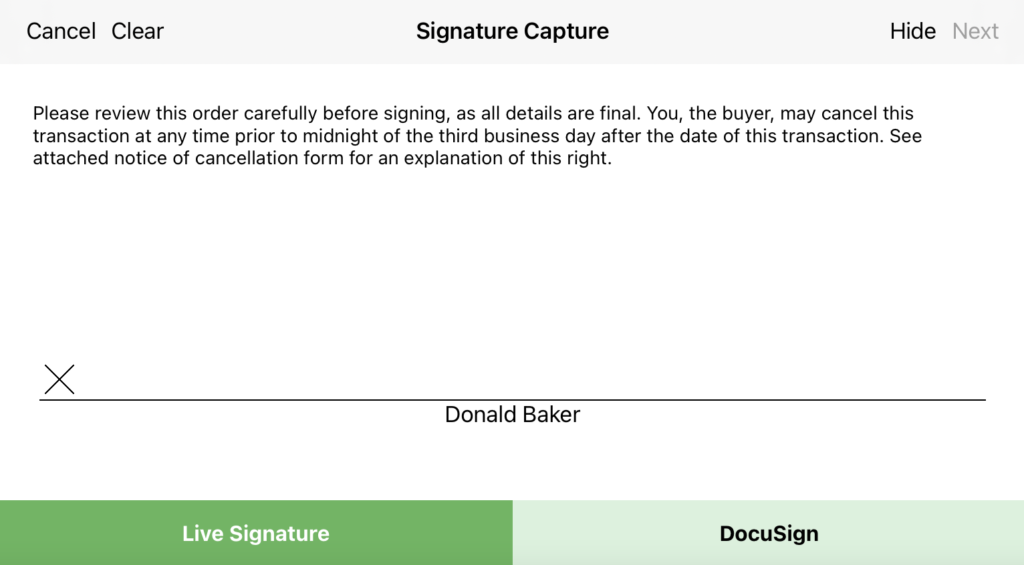
After the DocuSign button is pressed, a list of email addresses from the customer screen will be presented. Any email address can also be manually typed in.
Integration Setup with DocuSign
After a DocuSign has been completed by the recipient(s), you can have the document automatically finish the delivery process by following the contract upload or proposal upload settings (i.e. uploading to your CRM, emailing the customer, etc.).
To complete the setup of this integration:
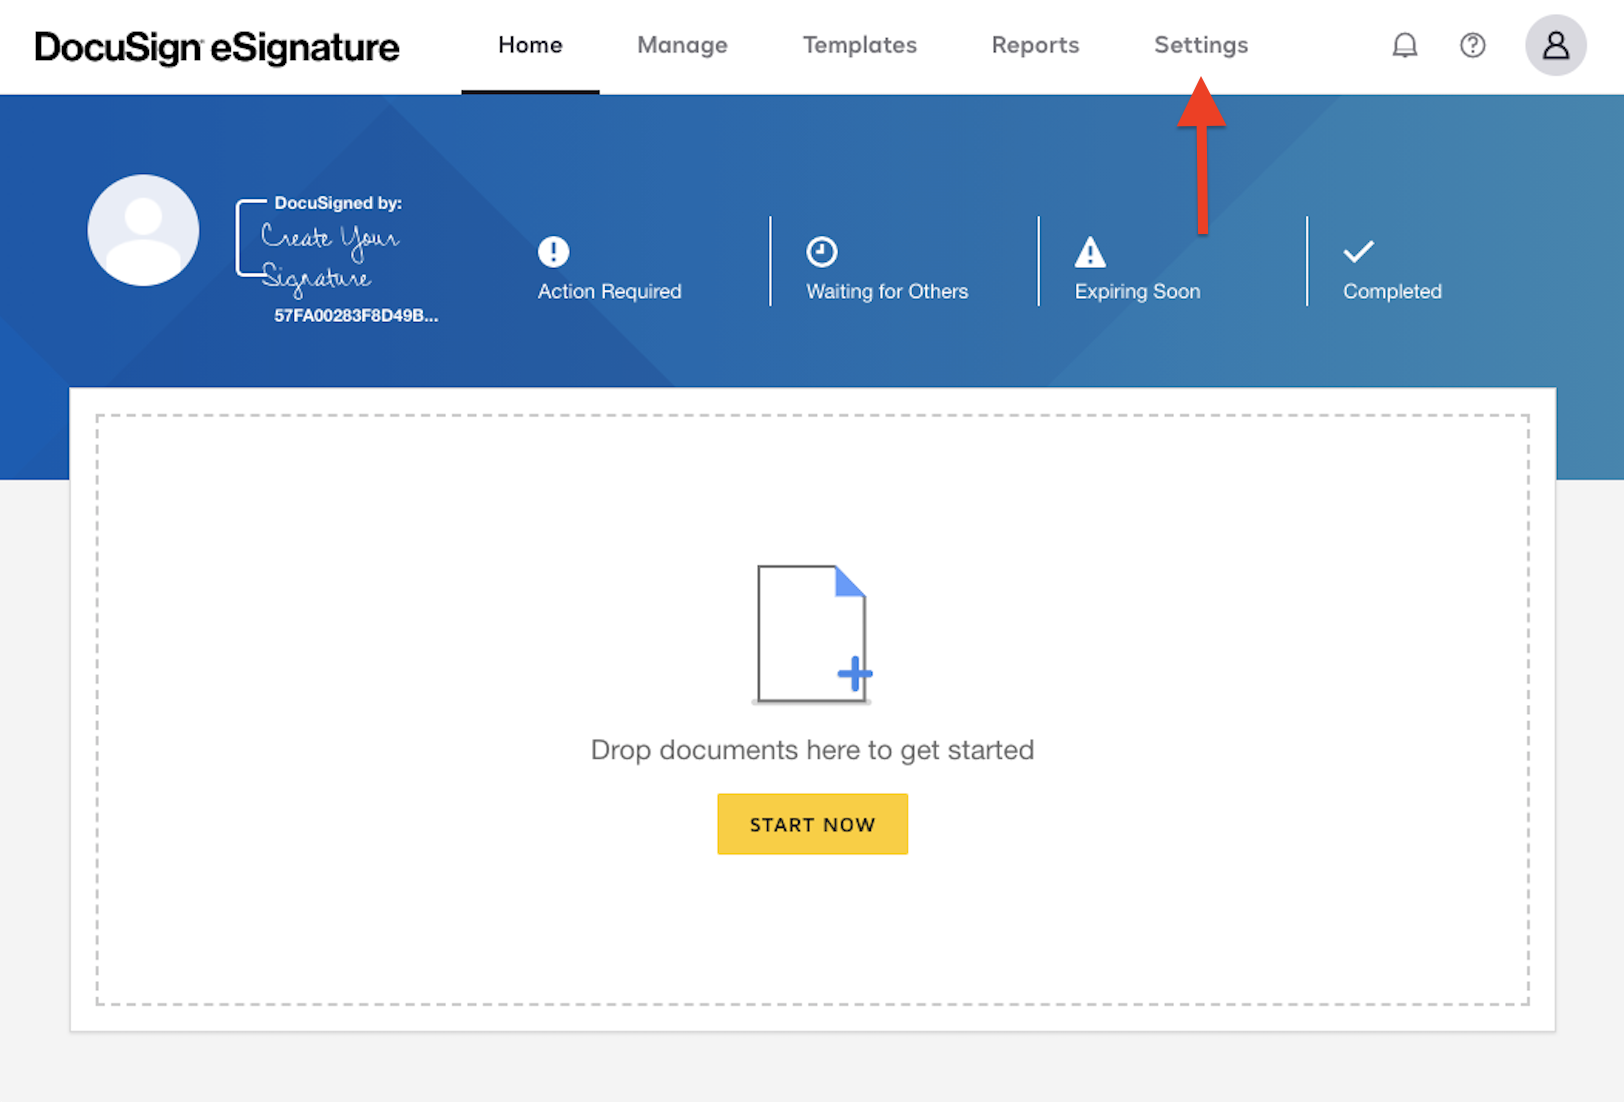
- Login to your DocuSign account.
- Click Settings.
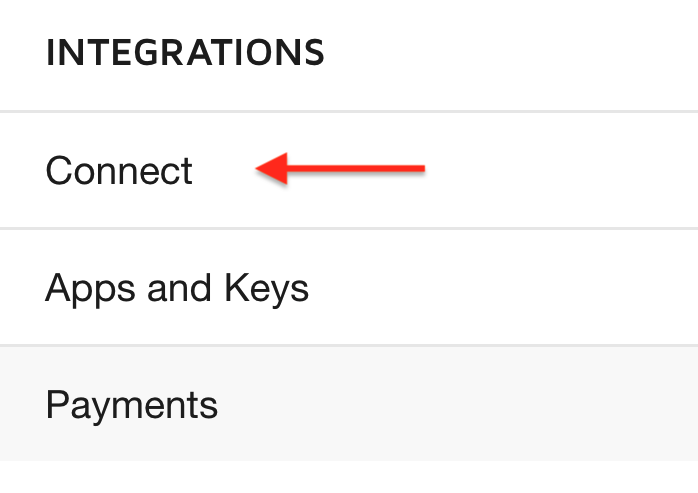
- Under Integrations on the left-hand menu, click Connect.
- Click Add Configuration > Custom.
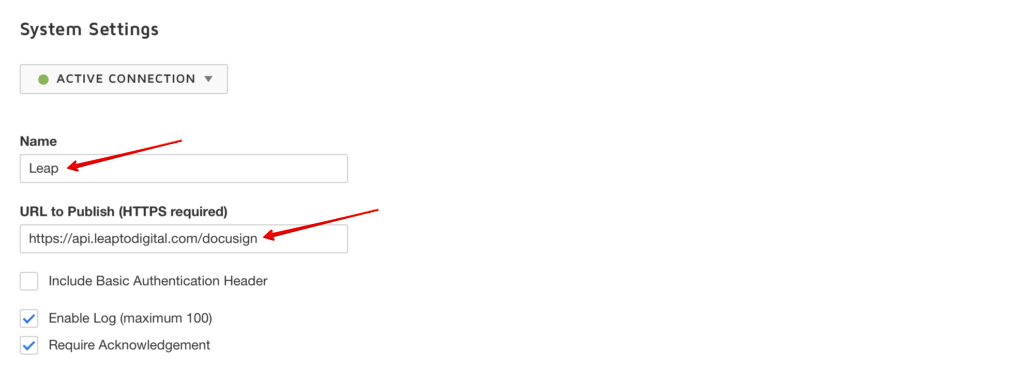
- Add SalesPro to the Name field.
- Add https://api.leaptodigital.com/docusign to the URL to the Publish (HTTPS required) field. Leave the Enable Log (maximum 100) and Require Acknowledgement fields checked.
- Under Data Format, select REST v2.1.
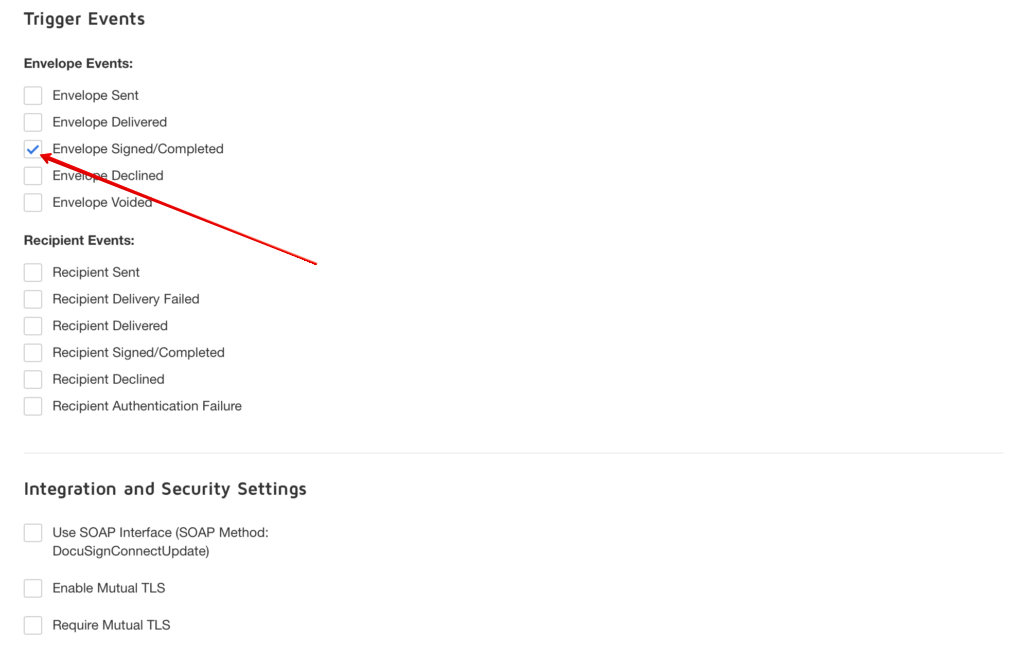
- Expand the section titled Envelope and Recipients. Under the column titled Envelope Events, select Envelope Signed/Completed.
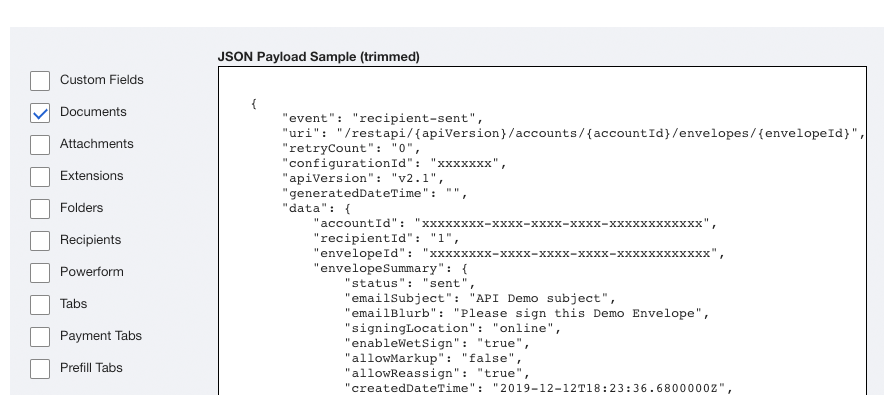
- Within the already expanded section, Envelope and Recipients, expand the section titled Include Data. Select the checkbox for Documents.
- Save your changes by clicking the Add Configuration button.
