Dynamic cells are used when data needs to be changed depending on the value of another cell. One example of this is colors that change dependent on the type of item selected. Another example is having additional cells appear depending on the form of payment, such as check or credit card information
Examples
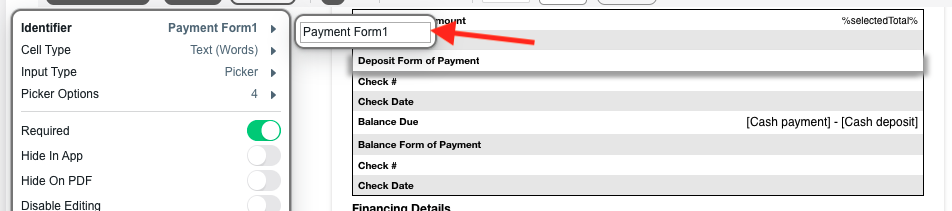
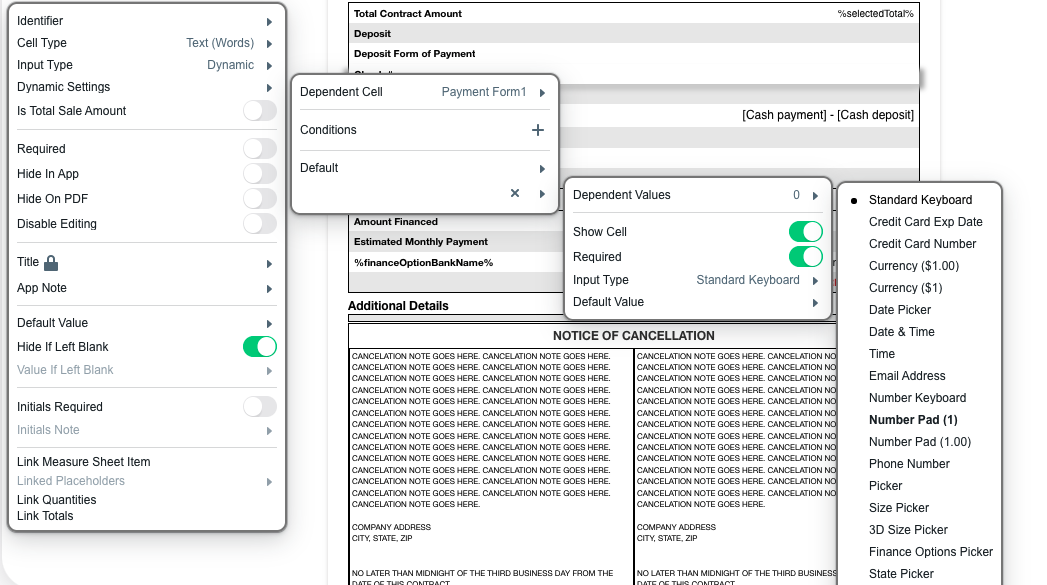
Example 1: Form of Payment
In the example below we will use Form of Payment to display and require a Check # if Check is selected.
- First, make sure Form of Payment has an Identifier in order to reference it in another cell.
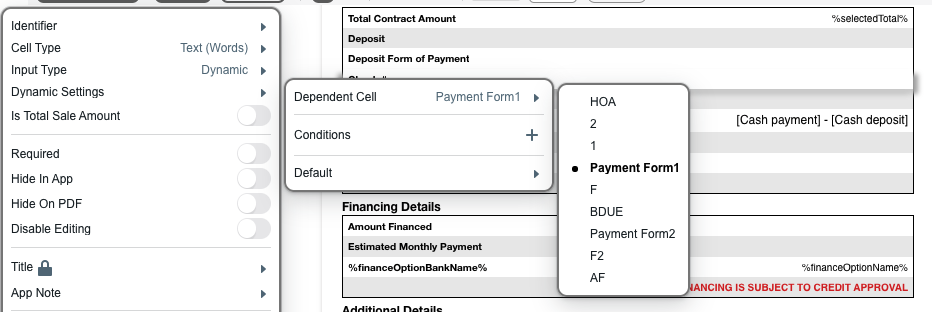
- Under the Check # cell click Settings, select Input Type and select Dynamic.

- Click Dynamic Settings. Hover over Dependant Cell and select the Form of Payment Identifier. This will reference the values within Form of Payment.
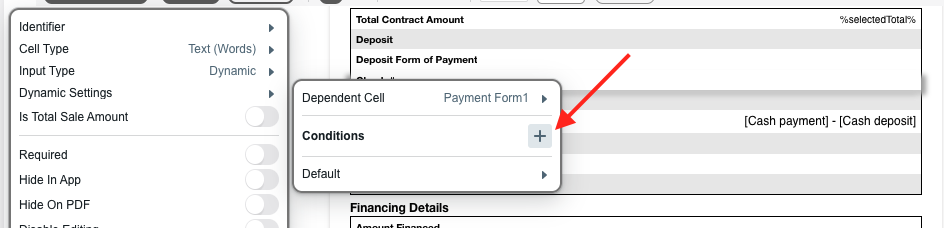
- Click the ‘+’ symbol under Conditions to add a Condition.
- The Condition will be a blank line. Hover over the line and then Dependent Values. Select Check as the Dependent Value.
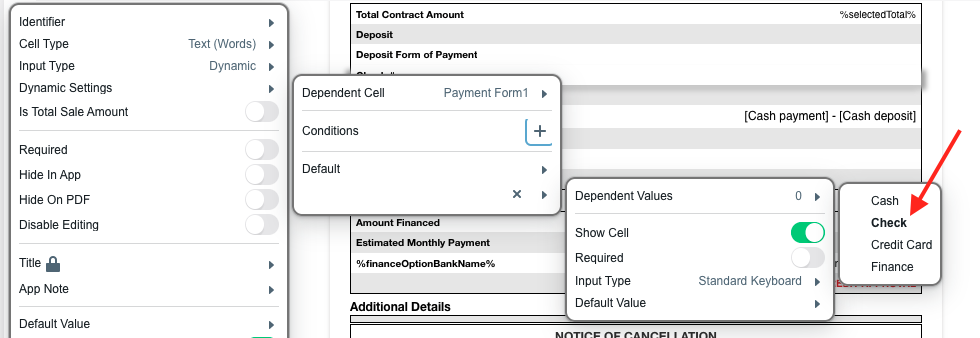
- Check off Show Cell and Required. Change the Input Type to Number Pad (1). What we are instructing SalesPro to do is if the Dependent Cell Form of Payment has the value Check we want to show the cell Check #, make it required, and present the user with a number pad to key in the Check #.
Example 2: Dynamic Color Selection
In this example, we will add a color picker based off of a size picker.
- Create a line item with the cell type Picker
- Create multiple options for the picker. In this example, we use 3.5 and 4.5.
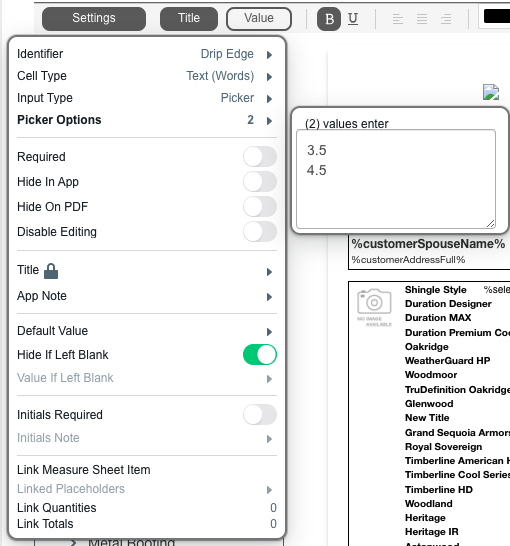
- Create an identifier for this cell. In this example we used Drip Edge.
- Create another line item with the cell type dynamic
- Click settings and Dynamic settings
- Hover over Dependent cell and choose Drip Edge This refers to the previous cell we made.
- Click the plus sign next to the Conditions line.
- Hover over the new blank condition line, and scroll to dependent values.
- Choose one of the values of the previous picker. In this example, 3.5 or 4.5
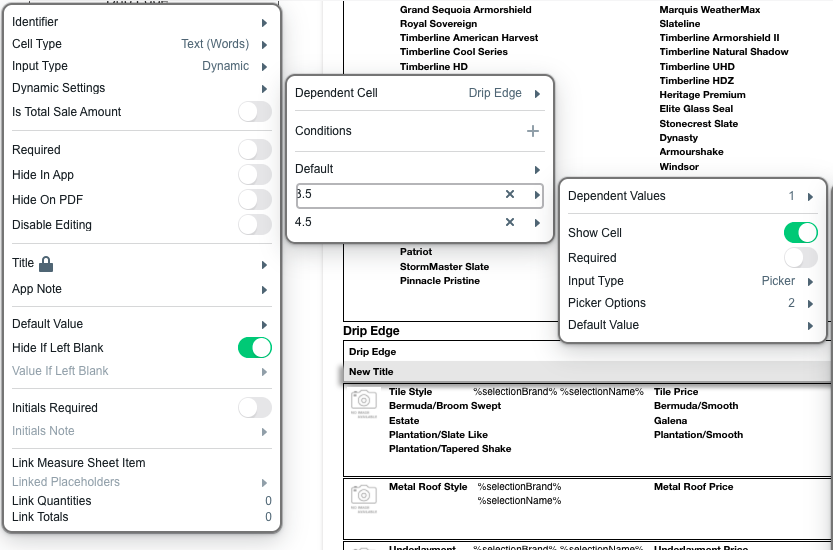
- Because we want a picker based off of whether 3.5 or 4.5 has been chosen, we can choose the input type picker. Enter in the options for the dependent picker here.
- Repeat the steps to add another condition based on the other option that has not been created yet.
Example 3: “Included” when Added to Estimate
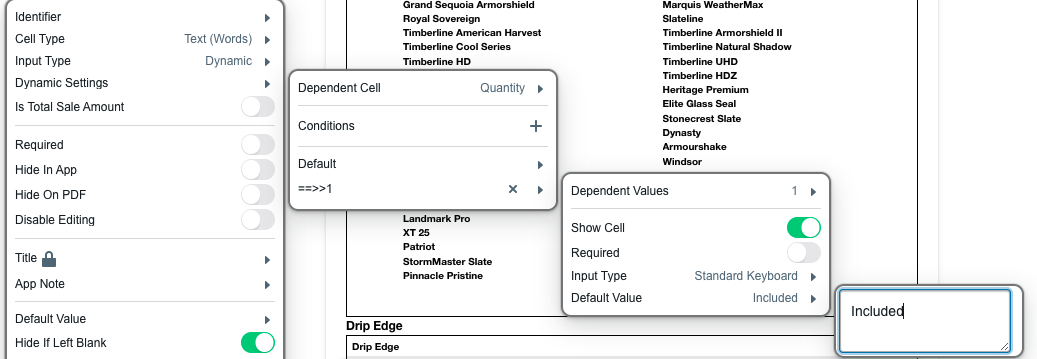
In this example, we will add a dynamic cell to show included if an item has a quantity of over 1.
- Create a line item where the cell is using the %quantity% placeholder in the new value field.
- Create an identifier for this cell. For this example, we use quantity
- Create a new line item and change the cell type to dynamic
- Click settings and Dynamic Settings
- Hover over dependent cell and choose quantity. This refers to the previous cell that will display the quantity of the item.
- Click the plus sign next to the “conditions” line.
- Hover over the new blank condition line, and scroll to dependent values.
- Enter the formula ==>>1. This means if the dependent cell has a value greater than 1, to display the value in the default value section of the dynamic settings.
This can also be used to use less than by using ==<<1 in the same field.