Adding headers to a document allow you to populate information on your documents including company information, customer information, company logos and images. You can create multiple header sections throughout the template to establish division between sections or to create horizontal groups within the template.
Quick Steps
- Create Header Container.
- Format Container.
- Add Header Groups.
- Edit Header Group Text + Images.
Create Header Container
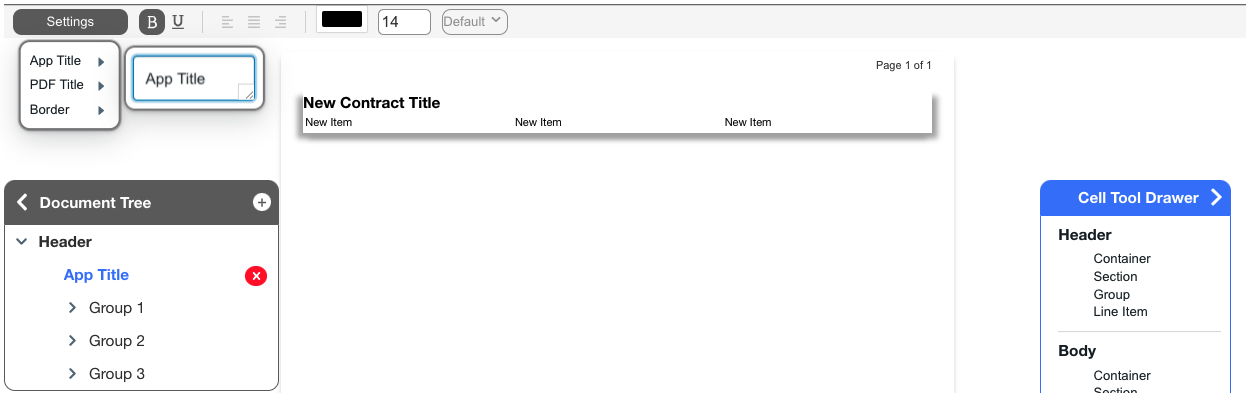
- Open the Cell Tool Drawer using the expand toolbar icon on the right side of the screen.
- Drag and drop a Header Container onto your document. This will create a Header Container with one Section containing three vertical Groups or columns.

Format Container
- Click on the header to select the Header Container.
- Select Settings menu.
- Use the Style Bar to format content:
- App Title: Displays in the document tree to identify the section name. Defaults to New App Title.
- Contract Title: Displays on the top left of the header section on the customer contract. Defaults to New Contract Title.
- Border: Draws border around the section (None, Top & Bottom, Inside & Outside, and Outside Only).
Add Groups
- Open the Cell Tool Drawer using the expand toolbar icon the right side of the screen.
- Drag and drop the Group from the drawer to the header container.
Edit Group Text + Images
- Click on the Group to highlight the group.
- Drag and drop a Line Item to the group.
- Select Settings menu.
- Select cell types and change text or images:
- Text: Allows you to free type text into the line item. For text cells you can modify the font style and size. Simple double-click into the line item to edit the text. See Placeholders article to bring in default content such as customer name and address from the estimate.
- Empty Space: Fills the group with empty space. After selecting you can designate the height of the empty space.
- Image: Allows you to browse and upload an image that will be displayed in this group. After uploading you can designate the height of the image.
- Company Logo: Displays the image you currently have uploaded under Settings > Company > Logo
Tips
- When creating headers you can utilize the copy/paste functionality to help speed up your process. Right click to copy and again paste. You can copy entire sections, groups, or individual line items.
- When adding images, make sure the file sizes are very small (< 100kb). Images that are too large will make your PDF file sizes large which can affect emailing and uploading.
- Utilizing images in headers can give you a lot of flexibility. Creating an image in a 3rd party software that will make up an entire header could produce great results. Creating 1 group with 1 horizontal cell and adding the single image to it, will allow you to create a full color header with logos, company info, etc.