The Salesforce integration allows the following information to be exchanged with SalesPro:
- Appointments
- Documents
- Credit Applications
- Results
Quick Steps
- Activate the Salesforce integration.
- Configure Salesforce Query & Mapping
- Add Salesforce Login Credentials
- Configure Document routing rules.
- Configure Results routing rules.
- Configure Credit App Sending rules.
Activate the Salesforce Integration
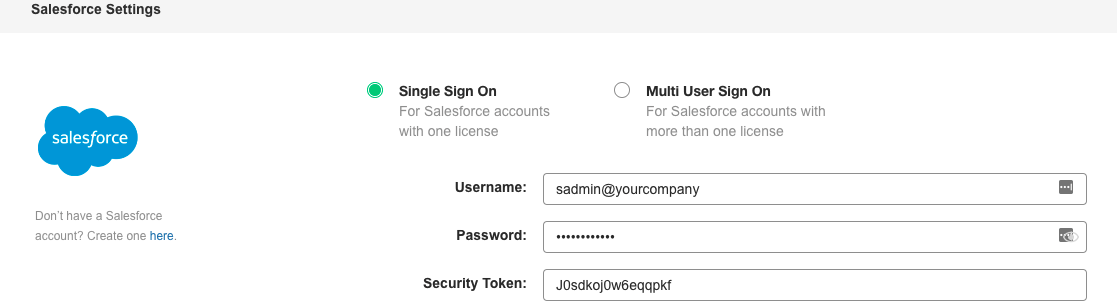
To activate the Salesforce integration, you will need to enter your Salesforce Company ID to connect your Salesforce account with SalesPro.
- Go to Workflow > CRM and Appointments.
- Switch on the Salesforce switch.
- Select if it is Single Sign on or Multi User Sign On.
- Enter the Salesforce username and password.
- Enter the Security Token.
Configure Salesforce Query & Mapping
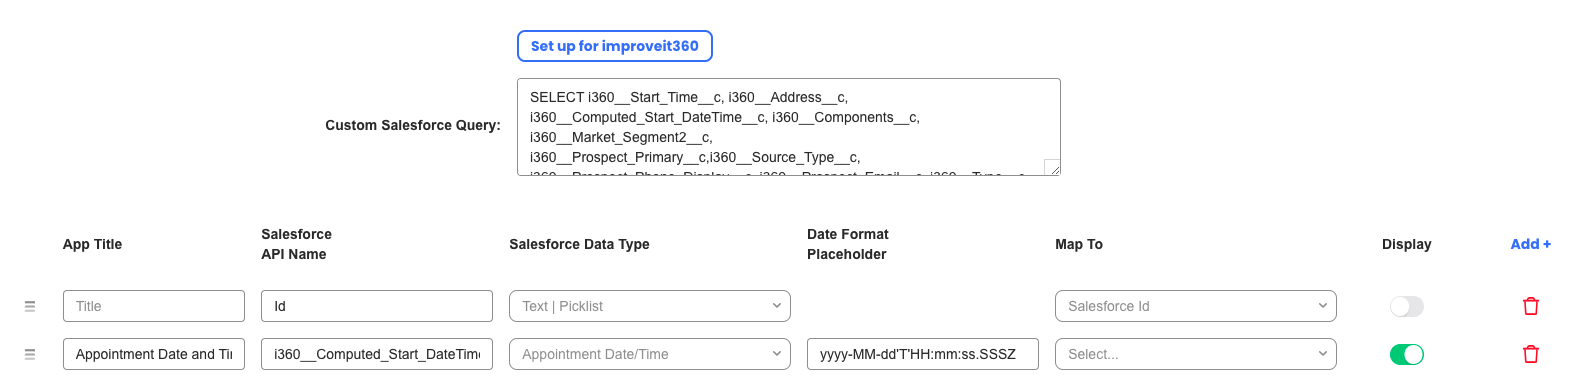
Using SOQL (Salesforce Object Query Language), SalesPro can retrieve appointment data from SalesPro. Data that is fetched from Salesforce can be mapped to fields within SalesPro.
- Go to Workflow > CRM and Appointments.
- Toggle the Salesforce toggle switch to ON.
- Create a Custom Salesforce Query or click the Setup for improveit 360 button.
- Add fields to map to fields within SalesPro.
- Click the Add + button to add a new field to map from Salesforce to SalesPro.
- Create a title you would like to give the field within the App Title.
- Enter the API Name of the field from Salesforce. In order to map these fields to SalesPro, they need to be retrieved by including within your query.
- Select the appropriate Salesforce Data Type.
- Select the field within SalesPro that the field should be mapped to.
- Designate whether or not you would like this field to be displayed within the Customer’s Appointment Notes.
- Click Save.
Add Salesforce Login Credentials
Individual User Credentials
In order for SalesPro to pull individual Sales Reps’ appointments you will need to add their Salesforce credentials to their individual user profiles.
- Go to Settings > Company > Users.
- Scroll down to the credentials section.
- Click the add button.
- Select Salesforce from Endpoint dropdown.
- Enter the user’s Salesforce Username and Password.

Single Sign-On Setup
Single Sign-On is used when SalesPro users will NOT have dedicated user licenses within Salesforce. This occurs when businesses are assigning appointments to sales reps through a lookup field, rather than an identified user (e.g. a custom Staff object record).
- Locate the unique record ID of each user’s record in Salesforce.
- Setup the Unique Identifier under Users.
- Go to Settings > Company > Users.
- Click on the Edit icon (pencil) under Action.
- Enter the Unique Identifier for each user from Salesforce. This will allow you to customize your Custom Salesforce Query to only display appointments to the logged-in user. Read more about Creating Custom Salesforce Queries to learn how to develop a query with similar filtering conditions.
Configure Workflow & Routing Rules
Document Routing Rules
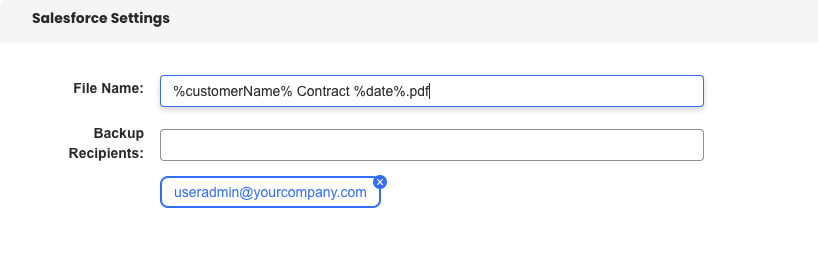
SalesPro will upload any documents such as Contracts, Proposals, or Custom Documents sent from the SalesPro application to Salesforce. The following steps are for Contract Routing. The same steps apply to Proposal Routing or any other document type.
- Go to Workflow > Document Routing.
- Toggle the Salesforce toggle to “on”.
- Create a default file name by adding a File Name (e.g. %customerName% Contract %date%.pdf).
- Add Backup Recipients email addresses. In the event a document fails to upload to Salesforce, the app will send an email to all email addresses listed in Backup Recipients. This email will include the attachment that failed to upload to Salesforce, as well as the customer information and a brief description of why it failed to upload.
Results Routing Rules
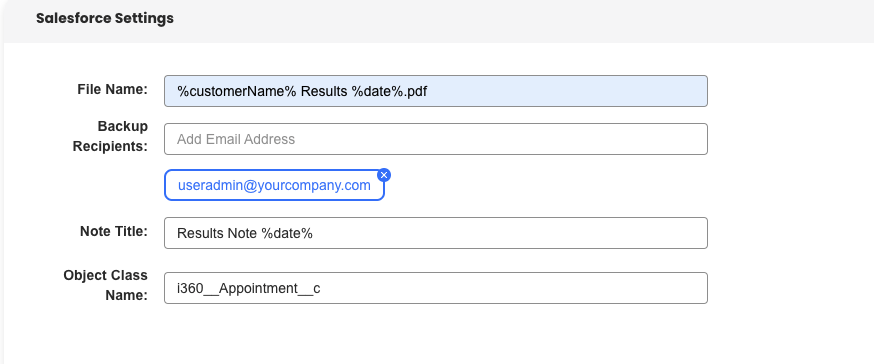
SalesPro allows Sales Reps to result an appointment in the App and have the results automatically updated in Salesforce. SalesPro will also generate a Results report with a summary of the estimate.
- Go to Workflow > Results Routing.
- Toggle the Salesforce toggle to “on”
- Create a default file name by adding a File Name (e.g. %customerName% Results %date%.pdf).
- Add Backup Recipients email addresses. In the event a document fails to upload to Salesforce, the app will send an email to all email addresses listed in Backup Recipients. This email will include the attachment that failed to upload to Salesforce, as well as the customer information and a brief description of why it failed to upload.
- Enter a Note Title.
- Enter the Object Class Name. This is Salesforce Object ID the Results will be sent to. (i.e. i360__Appointment__c)
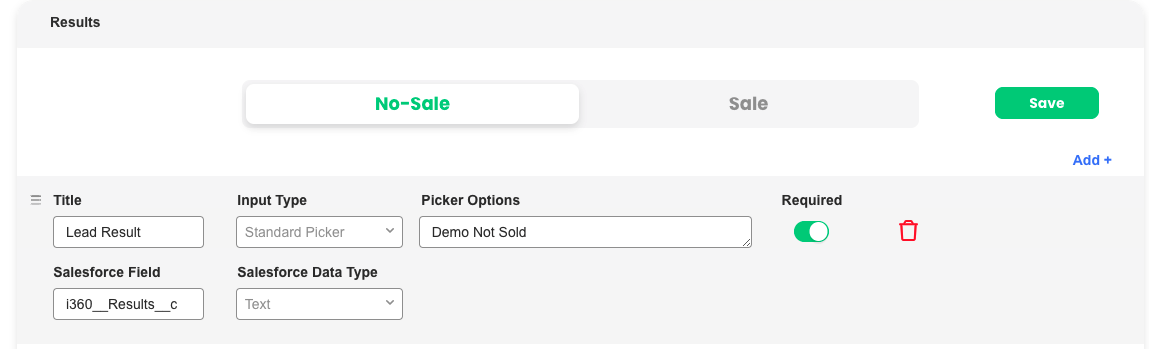
- In the No Sale section click Add once in each section, this will create 2 rows to push the results to Salesforce.
- Add a Standard Picker in the first row under No-Sale.
- Enter a Title. Example: Results or Lead Results.
- Change the Input Type to Standard Picker.
- Enter Picker Options. This will be a list of the different possible result reasons (I.e. Demo Not Sold, Too Expensive, Getting Other Estimates, etc..)
- Enter the Salesforce Object ID into the Salesforce Field (I.e. i360__Result__c)
- Toggle the Required switch to make this field required.
- Add a Standard Picker in the first row under Sale.
- Enter a Title. Example: Results or Lead Result.
- Change the Input Type to Standard Picker.
- Enter a Picker Option. This will only need one option generally of “Demo Sold”.
- Enter the Salesforce Object ID into the Salesforce Field (I.e. i360__Result__c)
- Toggle the Required switch to make this field required.
Credit App Sending Rules
SalesPro will upload any credit applications sent from the application to Salesforce.
- Go to Finance > Credit App Sending.
- Select Salesforce from the API drop-down menu.
- Add a Disclosure to appear to the customer when signing the credit application.
- Add a Password to protect the credit application. Only users with the password will be able to open the credit application.
- Create a default file name by adding a File Name.
- Add Backup Recipients email addresses. In the event a document fails to upload to Salesforce, the app will send an email to all email addresses listed in Backup Recipients. This email will include the attachment that failed to upload to Salesforce, as well as the customer information and a brief description of why it failed to upload.