Secure Payment Capture allows you to securely capture PCI compliant Credit Card and eCheck payment information. The payment information is then encrypted, tokenized, and securely transferred to your payment gateway. All data is stored and processed via your payment gateway.
Capture Now vs. Capture Later
When using SalesPro in the field, Users will have the ability to collect payment information from Customers one of two ways – capture now or capture later.
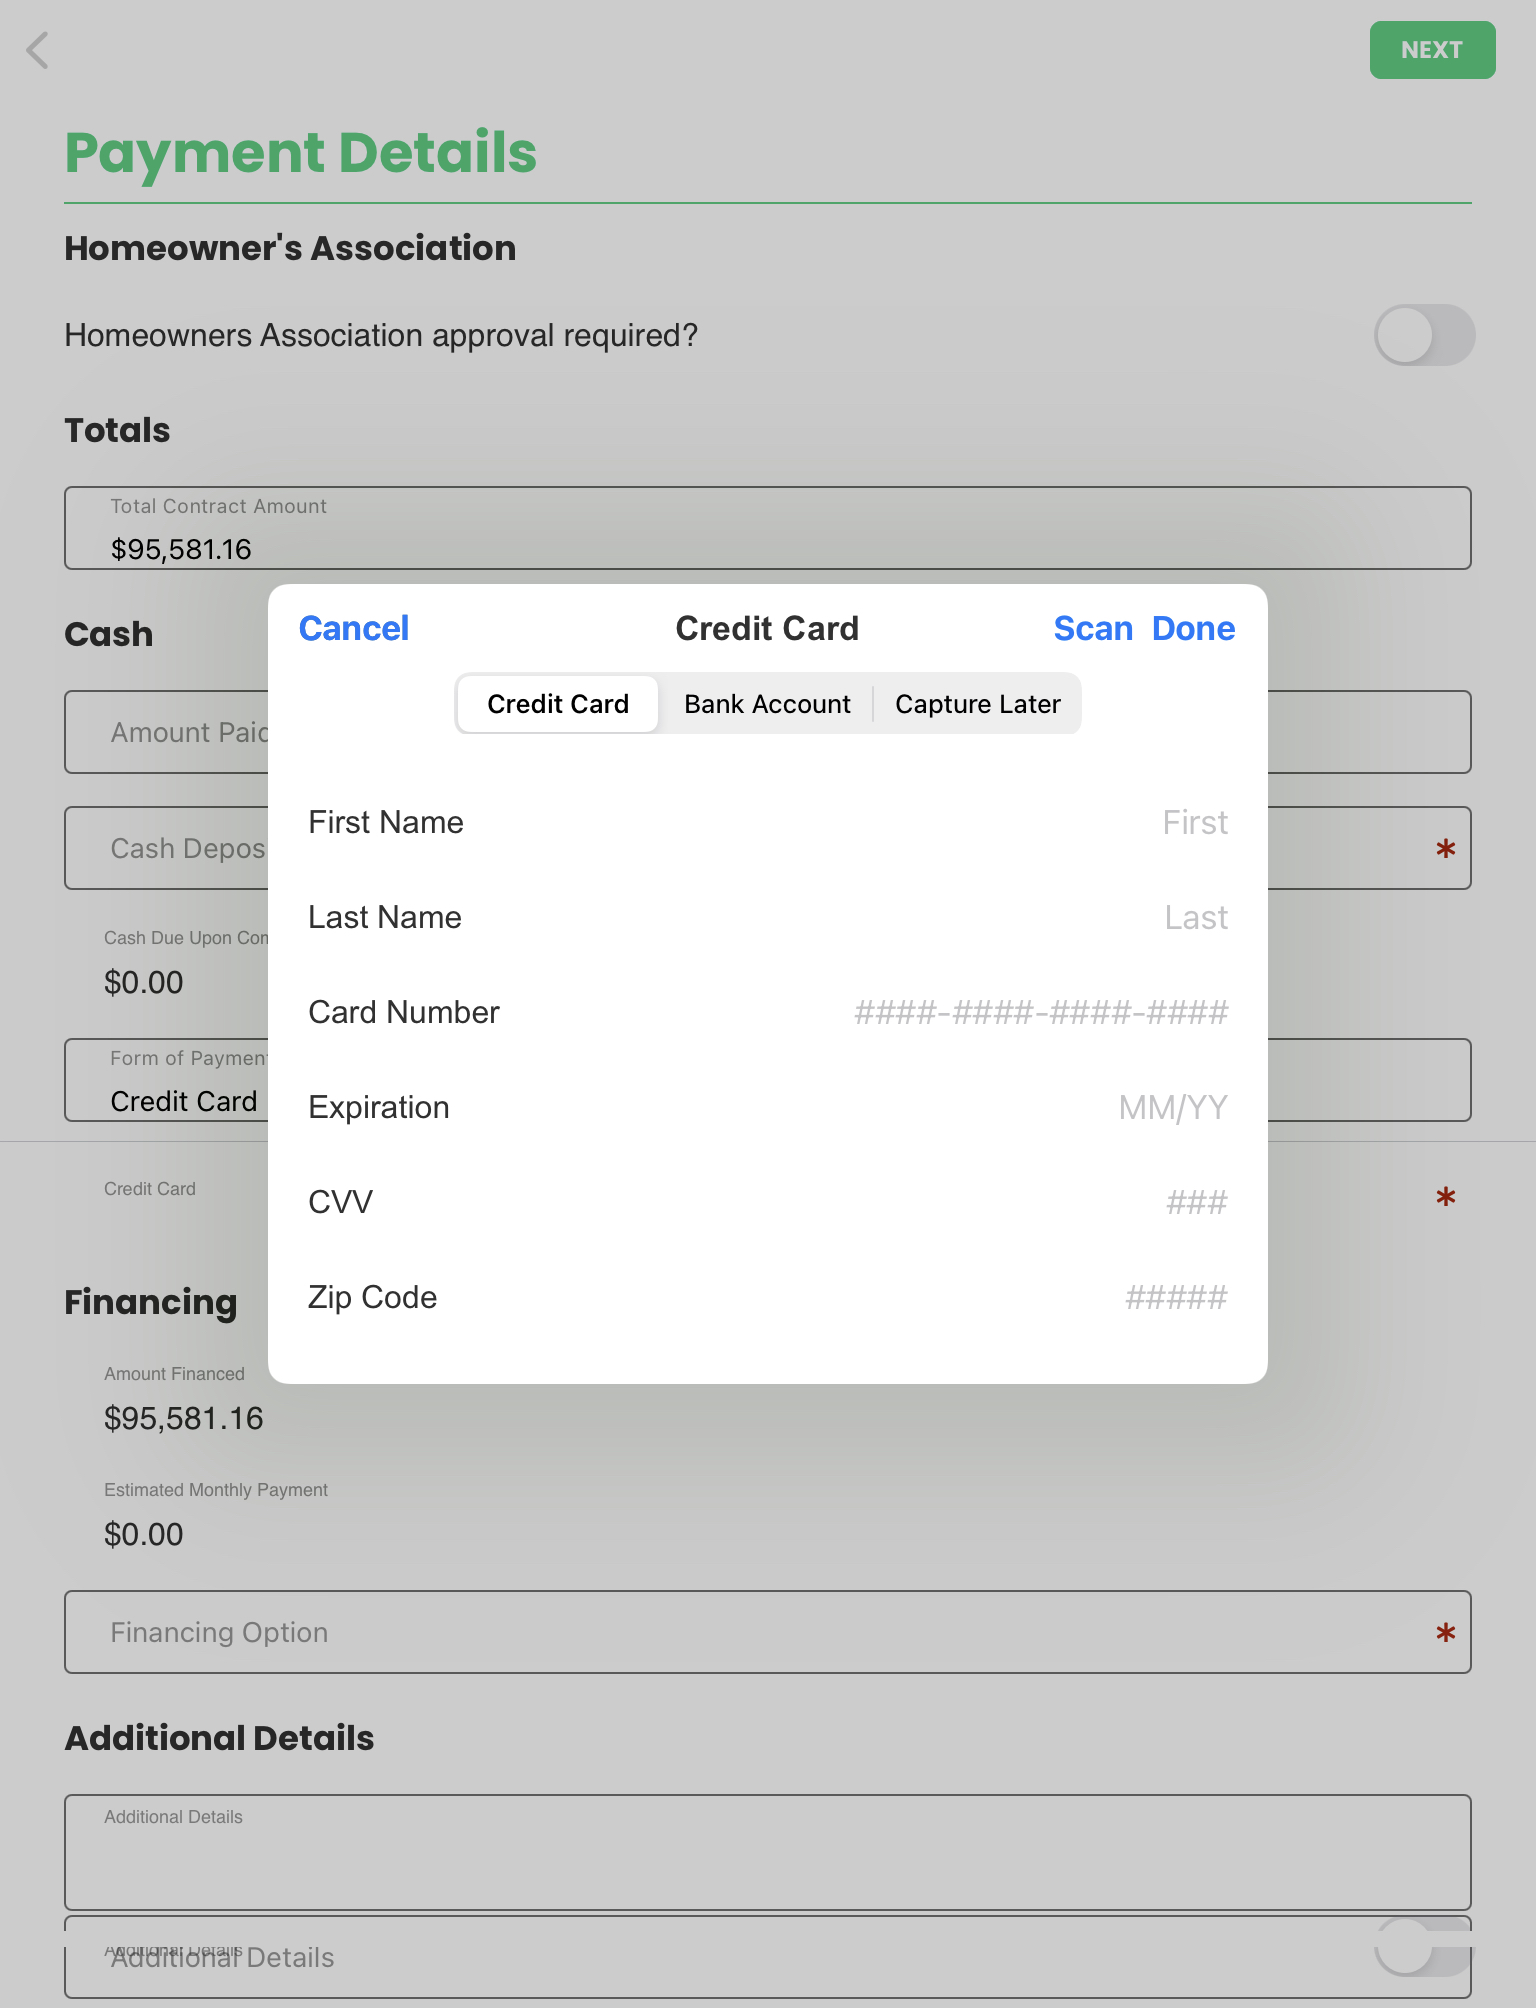
If using Capture Now, a User is able to collect payment information from a Customer in-home. When the information is captured, the data will be processed through your payment gateway to be authorized to ensure validity. While an actual payment is not being captured at this time, this authorization will allow an admin to initiate a charge to be processed via your integrated payment gateway within SalesPro’s admin dashboard or the payment gateway itself.
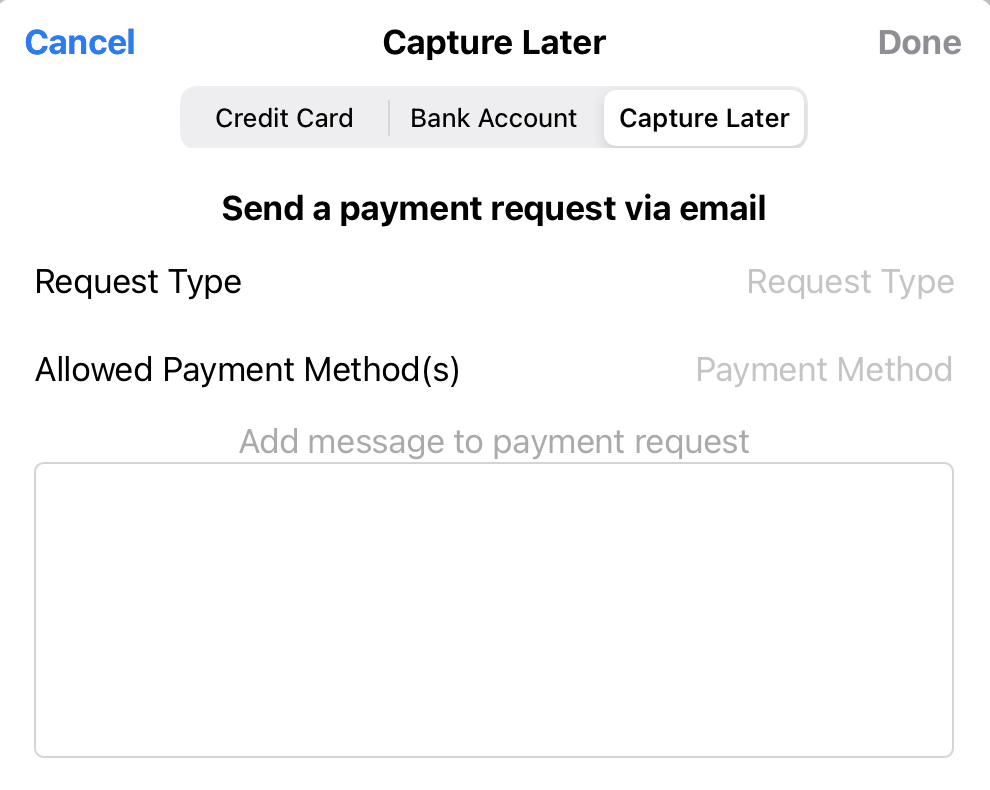
If using Capture Later, a User is able to collect payment information from the Customer remotely. The request type can be “Capture Only” or “Capture and Charge.” When the Customer receives the request, they will need to provide their information for authorization. If “Capture Only” is selected, the request will simply authorize the Customer’s payment information. If “Capture and Charge” is selected, the Customer’s payment information will be authorized and a charge will be captured.
Integration Setup
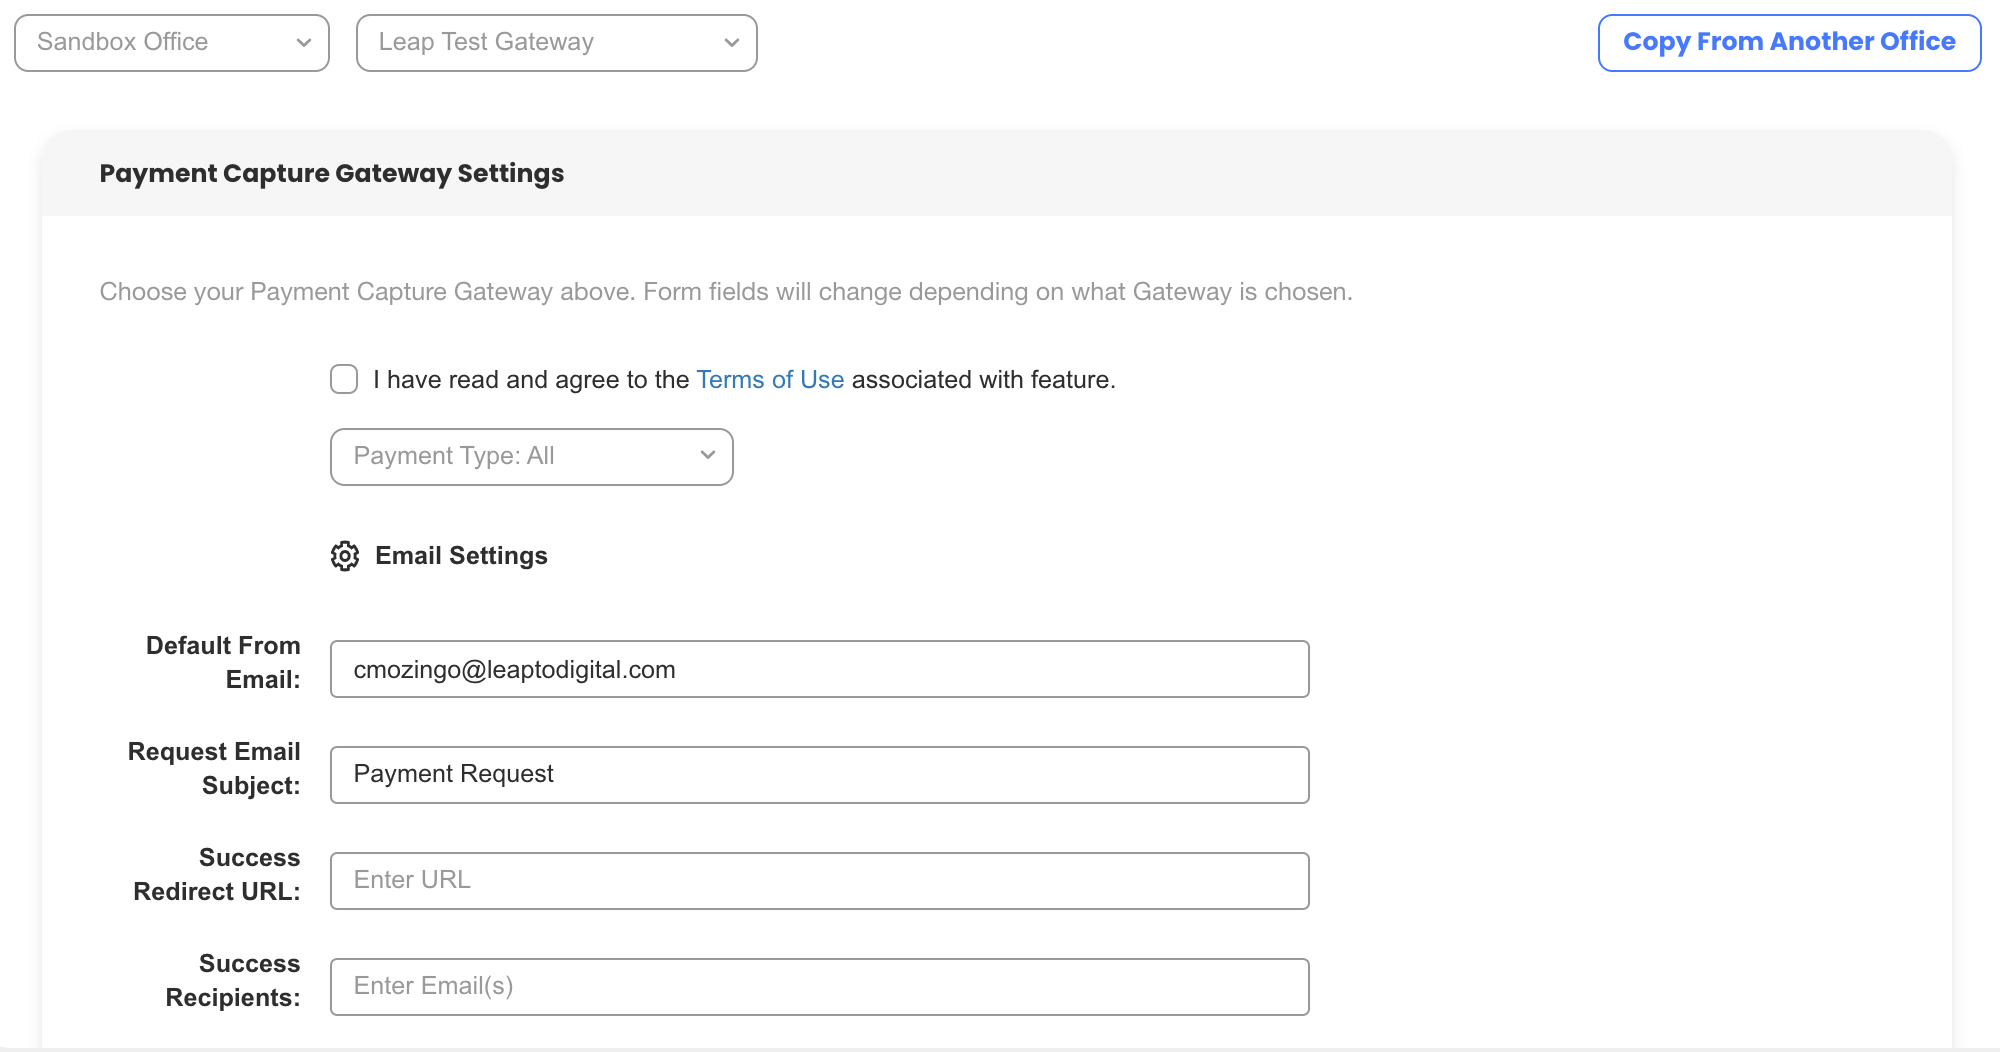
The majority of payment processors require a username and password although others may require a merchant ID and/or a unique key. Your payment processor can provide this information for you. There are several other fields that can be customized as well.
- Select the Gateway from the list of Payment Processors.
- Enter the required fields for the Gateway.
- Check “I have read and agree to the Terms of Use associated with this feature.”
- Enter a Default From Email. This is the email address the payment request will be sent from.
- Enter a Request Email Subject. This is the subject of the payment request emails.
- Select the Allowed Payment Types. Check off whether the payment processor accepts Credit Cards, Bank/eCheck payments, or both.
- Enter a Success Redirect URL. This is the website the customer will be redirected to after submitting payment. If left blank the customer will be redirected to a generic SalesPro thank you page
- Enter at least one Success Notification Recipient. This is the email address of the person who should be notified when a payment is submitted.
- The Default Email Template has a generic email layout for the payment request, however, it can be modified.
Contract Setup
Setup the payment section of your contract with the Secure Payment Capture cell to allow your contract to capture this information.
- Edit the contract that contains the payment section.
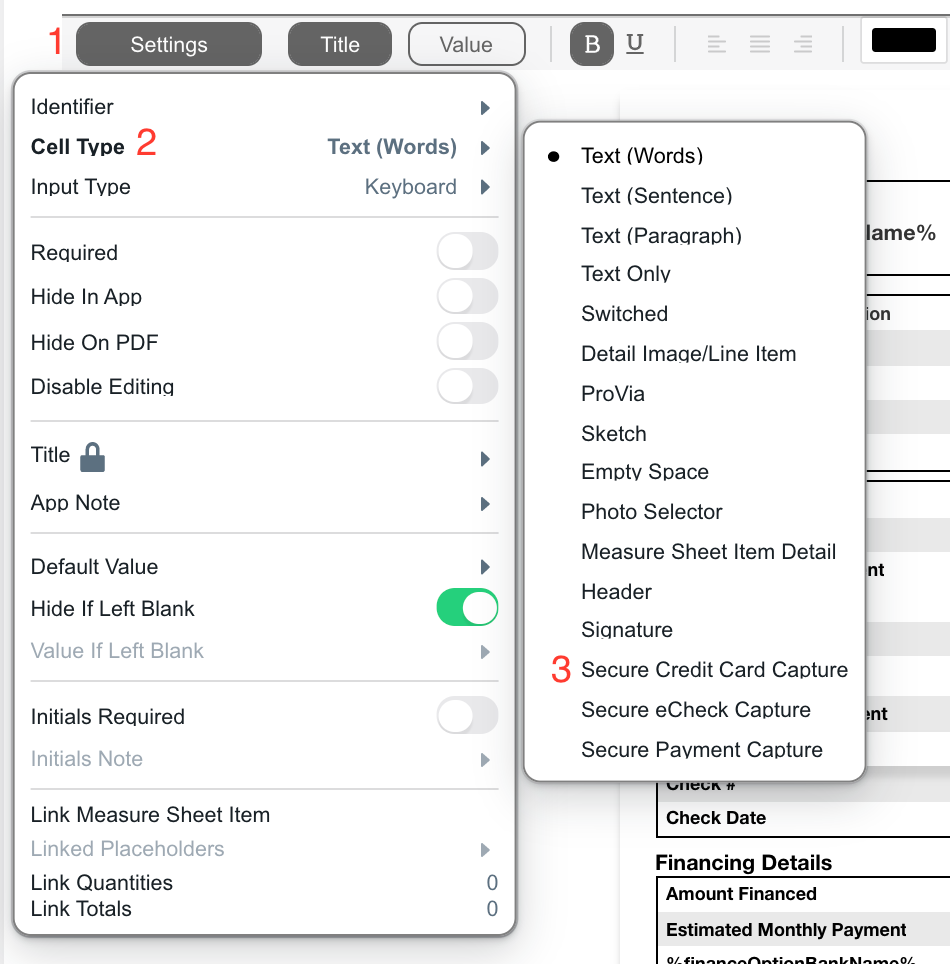
- Change Credit Card Cell Type to Secure Credit Card Capture.
- Select the cell that contains the payment information.
- Click Settings.
- Click Cell Type.
- Click Secure Payment Capture.
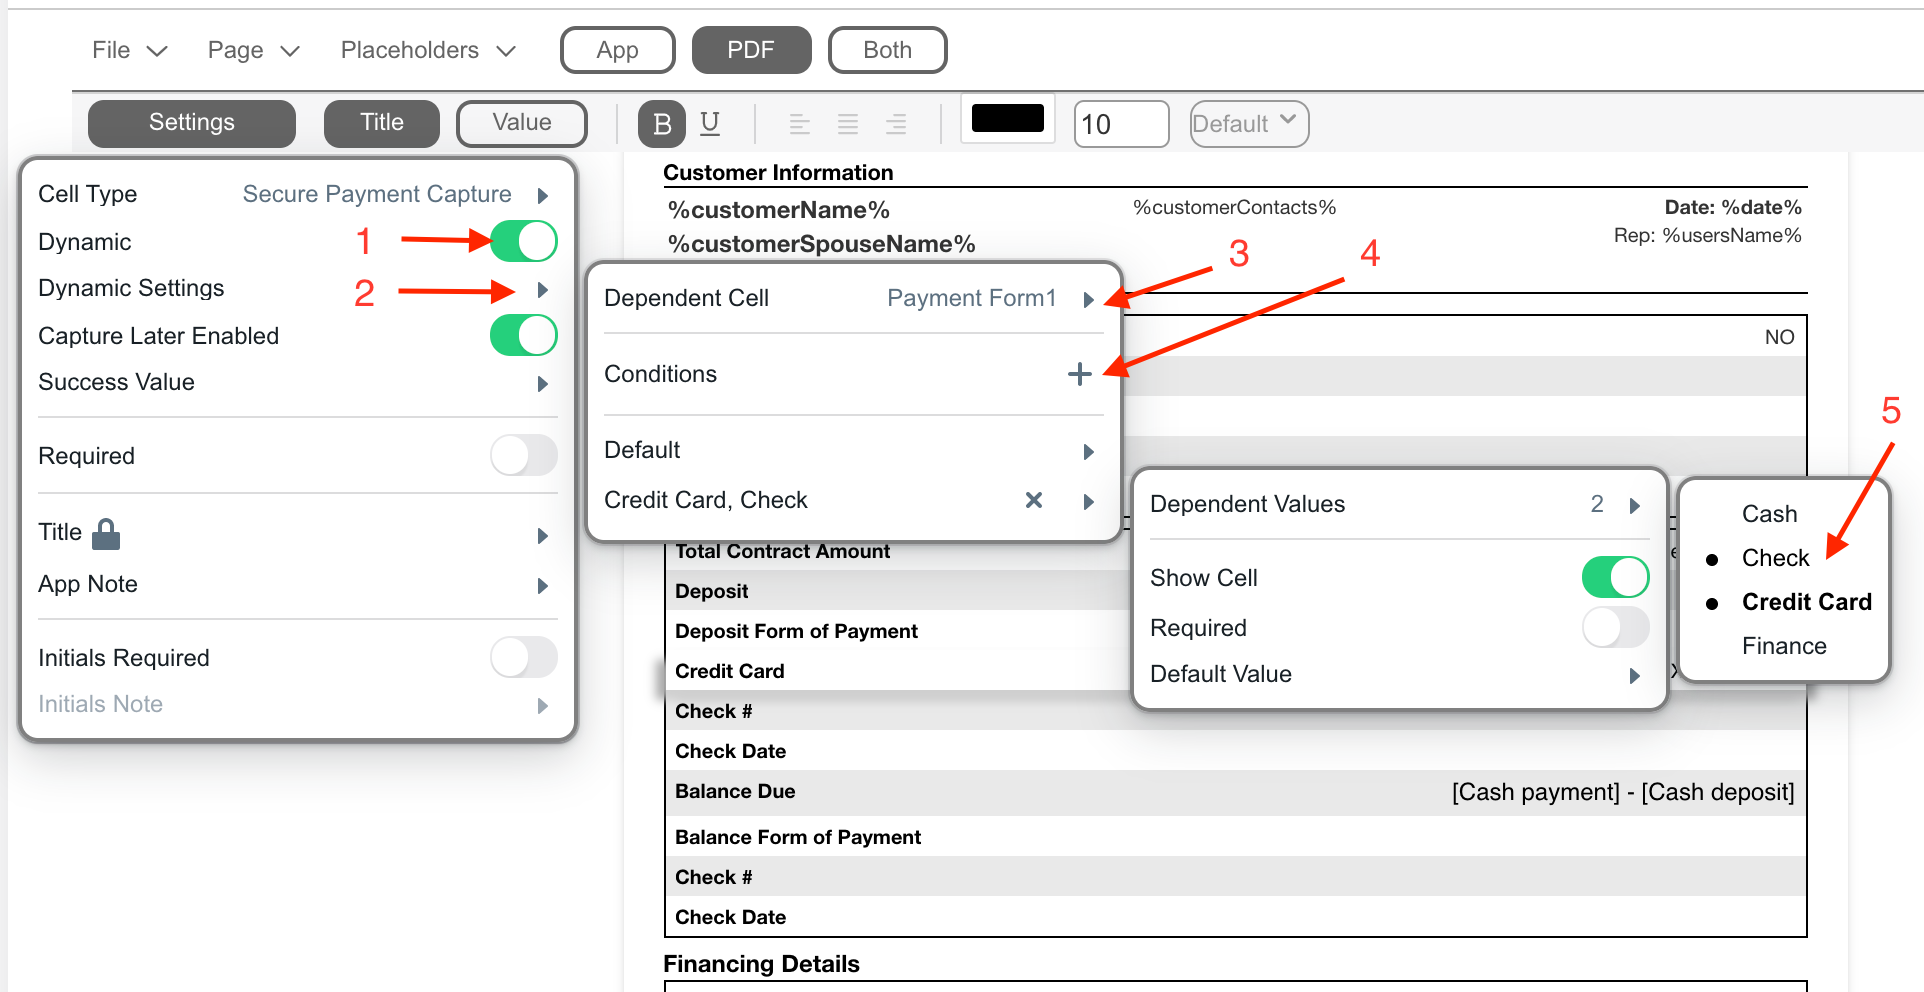
- Set up Secure Payment Capture to be a dynamic cell.
- In Settings, switch on Dynamic.
- Open up Dynamic Settings.
- Choose a Dependent Cell. This field contains the identifier of the cell where the you choose which Payment Method the customer is using.
- Add a Condition.
- Set the condition’s Dependent Value(s). Select the method of payment you want to capture securely. (ie. Check, Credit Card)
- Save changes to the Contract.
Capturing Payment Information
Once you’ve set up the Integration and Contract on the Dashboard, you can now securely capture payment information on the SalesPro App. To capture credit card or check information, navigate to the payment section of the contract and tap the cell that contains the appropriate form of payment.
Capture Now
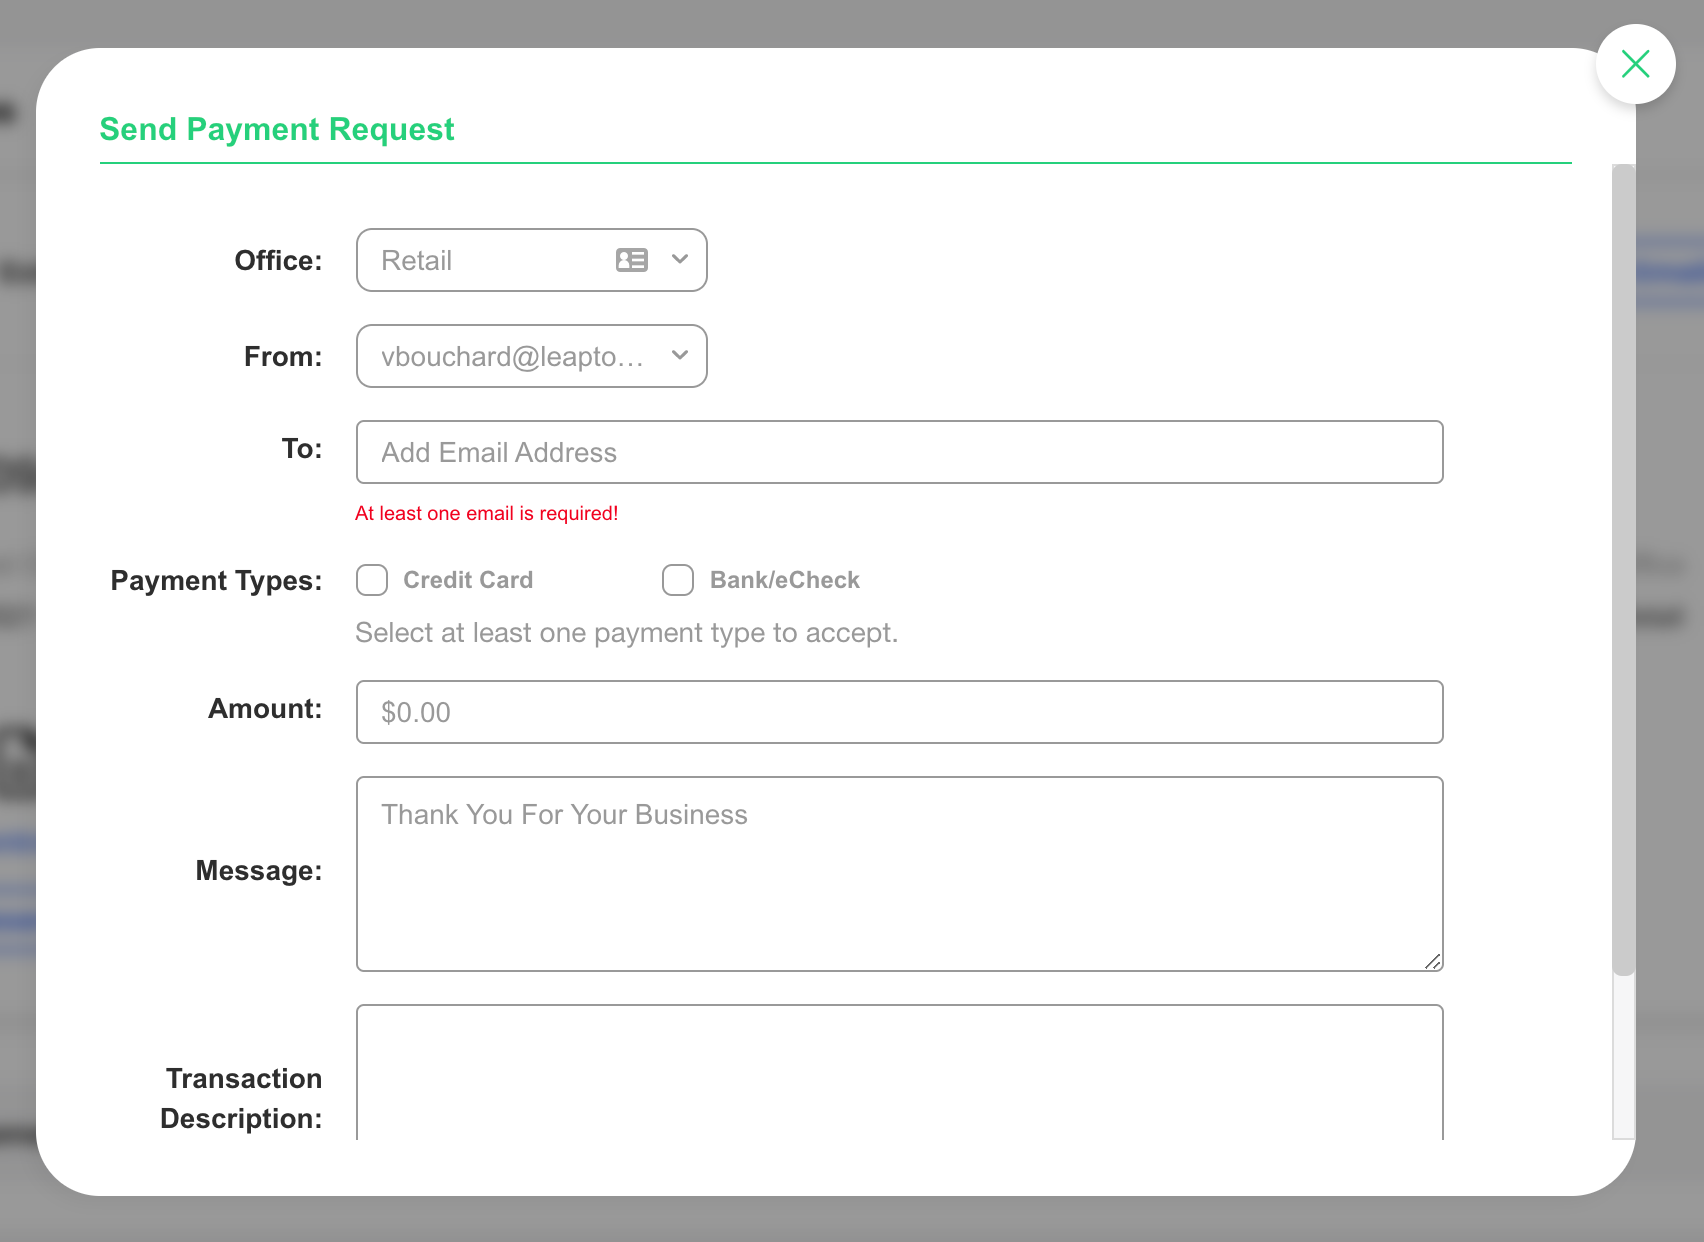
Capture Later
You have the ability to send your customer a Secure Payment Capture Request for them to fill out payment information themselves. To capture later:
- In the document editor on the dashboard, toggle on Capture Later Enabled.
- In the SalesPro app, select the Capture Later tab.
- Select the Request Type.
Processing Payments
After a payment method has been securely captured it will be stored within the customer record in the Estimates section.
Clicking the customer’s record will display any payment methods and previous transactions toward the bottom of the page. It also contains any attachments including the contract in case the total contract amount, deposit, balance, and any other previous payments need to be referenced.
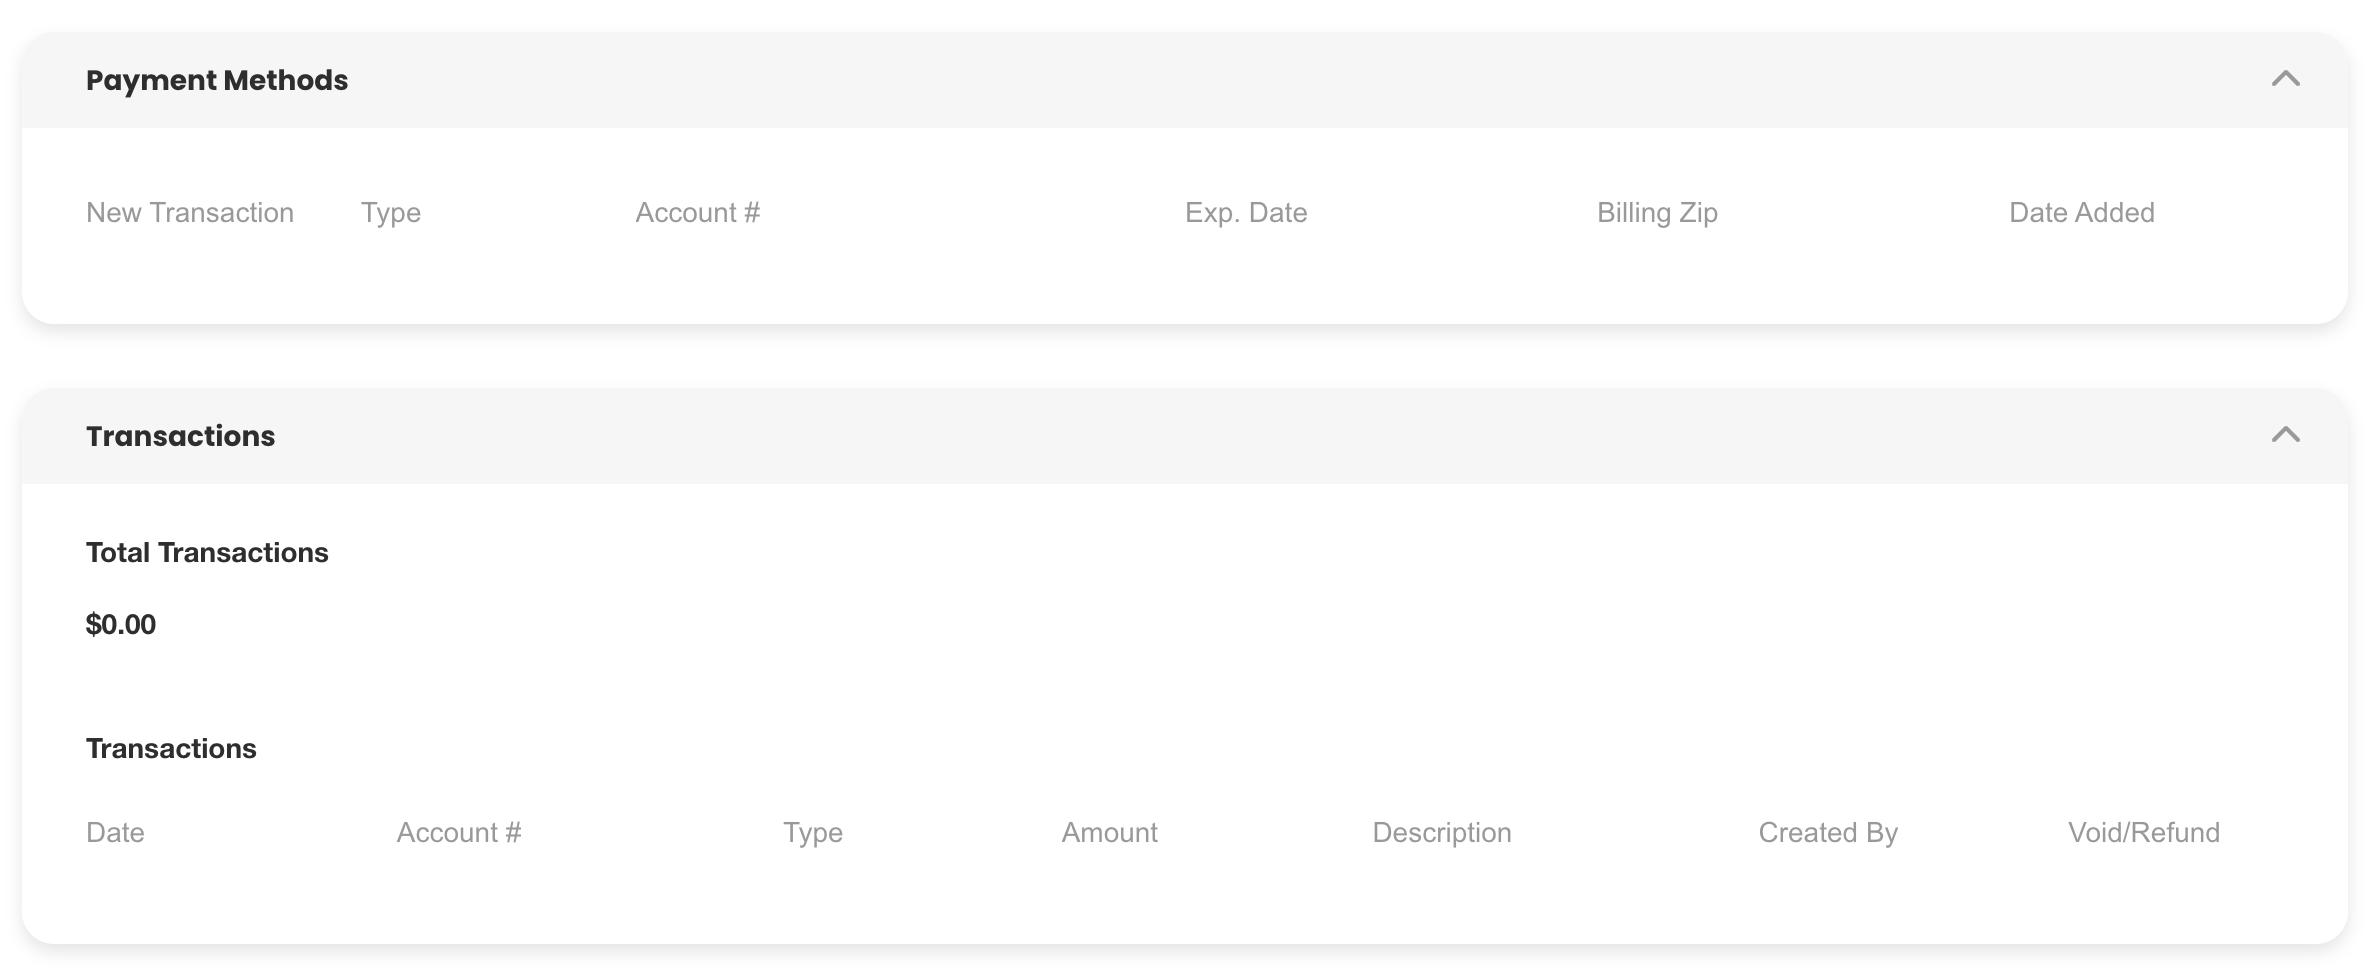
Clicking the payment method will open a window to initiate a new transaction.
Deactivating a Payment Record
On occasion, you may want to deactivate a payment record from charged in SalesPro. To do so, you can simply click the Delete icon next to the related record.

