The JobNimbus integration allows the following information to be exchanged with SalesPro:
- Appointments
- Documents
- Credit Applications
- Results
Quick Steps
- Activate the JobNimbus integration.
- Designate JobNimbus Appointment Types.
- Add JobNimbus login credential to each user’s profile.
- Configure Document routing rules.
- Configure Results routing rules.
- Configure Credit App Sending rules.
Activate the JobNimbus Integration
To activate the JobNimbus integration, you will need to enter your JobNimbus API Key.
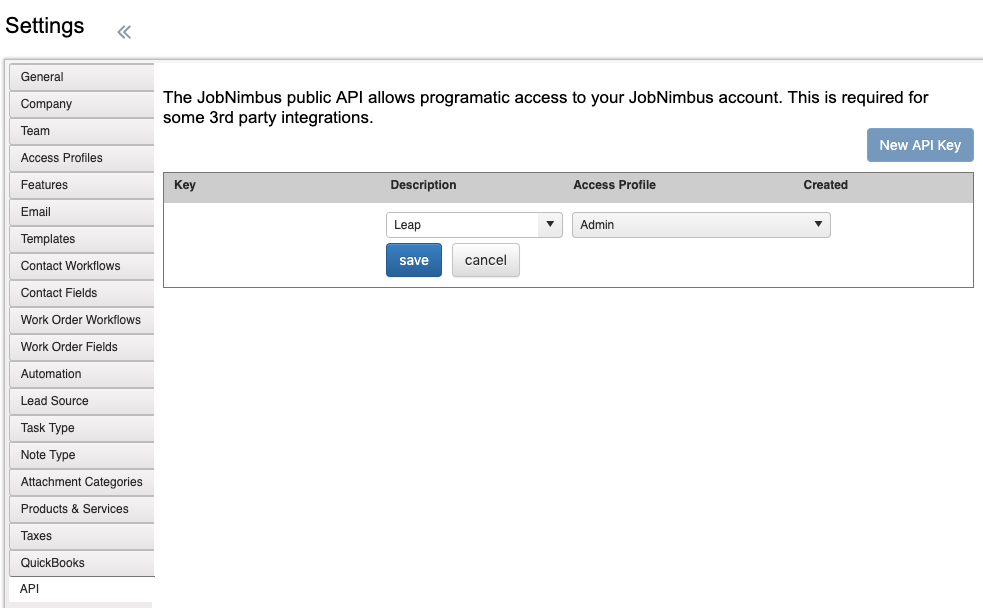
- Retrieve the API Key from JobNimbus.
- As a JobNimbus Administrator, proceed to the API section of your JobNimbus Settings.
- Select New API Key.
- In the Description enter SalesPro.
- For the Access Profile, select an Admin profile or a profile with Settings access.
- Click Save.
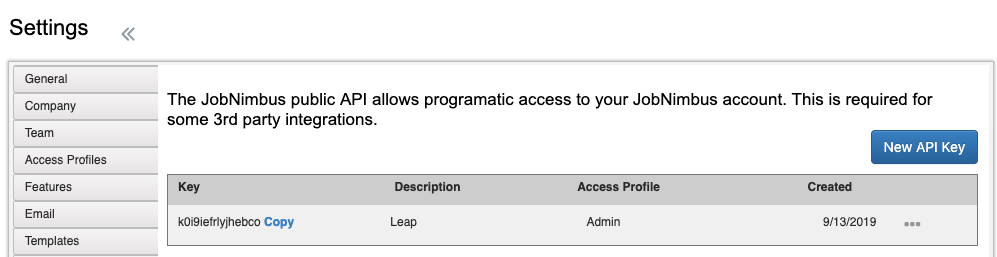
- A new API Key entry will be available. To the right of the API key, select Copy. The API will now be in your computer’s clipboard.

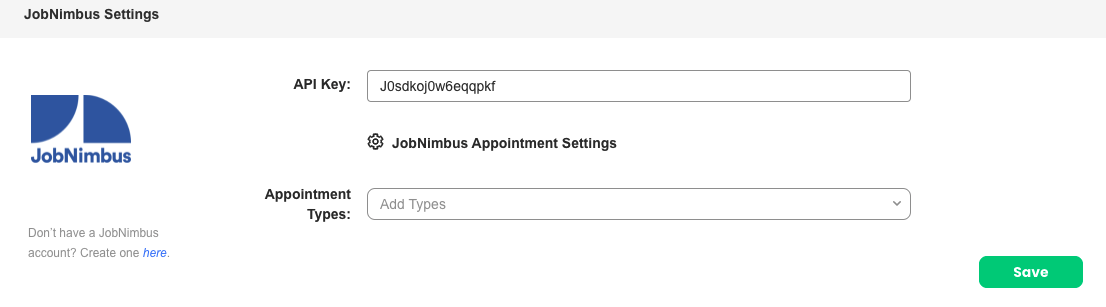
- Enter the API key in SalesPro.
- Go to Workflow > CRM and Appointments.
- Toggle on the JobNimbus toggle switch to ON.
- Enter your API key.
- Click Save.
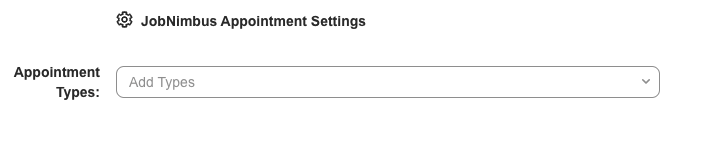
Designate JobNimbus Appointment Types
SalesPro will connect with JobNimbus and pull over the appointments that are assigned to the Sales Rep. Appointments will have customers’ personal information (name, address, phone, email) along with any appointment notes.
- Go to Workflow > CRM and Appointments.
- Choose the Appointment Types desired to be used with the integration.
- Click Save.
Add JobNimbus Login Credentials
In order for SalesPro to pull individual Sales Reps’ appointments, you will need to add their JobNimbus credentials to their individual user profiles.
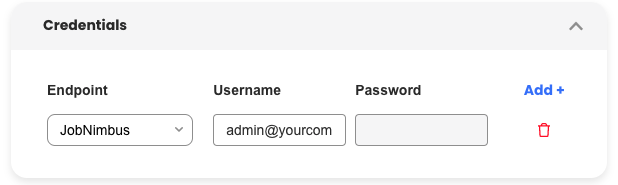
- Go to Company > Users.
- Click on the pencil button under Action.
- Scroll down to the Credentials section.
- Click the Add button.
- Select JobNimbus from Endpoint dropdown.
- Within the username field, input the email address associated with the JobNimbus user’s account.
Configure Workflow & Routing Rules
Document Routing Rules
SalesPro will upload any documents such as Contracts, Proposals, or Custom Documents sent from the SalesPro application to JobNimbus. The following steps are for Contract Routing. The same steps apply to Proposal Routing or any other document type.
- Go to Workflow > Document Routing.
- Toggle the JobNimbus toggle to “on”.
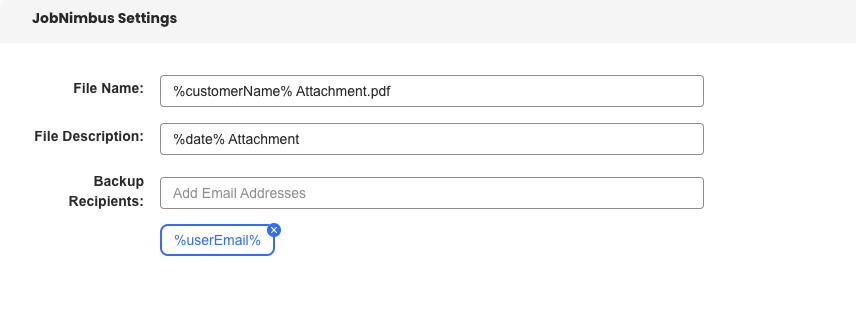
- Create a default file name by adding a File Name (e.g. %customerName% Contract %date%.pdf).
- Create a default file description by adding a File Description.
- Add Backup Recipients email addresses. In the event a document fails to upload to JobNimbus, the app will send an email to all email addresses listed in Backup Recipients. This email will include the attachment that failed to upload to JobNimbus, as well as the customer information and a brief description of why it failed to upload.
Results Routing Rules
SalesPro allows Sales Reps to result an appointment in the App and have the results automatically updated in JobNimbus. SalesPro will also generate a Results report with a summary of the estimate. The following information for results will be updated: JobNimbus Customer Workflow Picker: SalesPro will pull the JobNimbus Customer Workflow Picker values entered in JobNimbus for sales reps to select. (For Example: Demo Not Sold, Demo Maybe, etc..)
- Go to Workflow > Results Routing.
- Toggle the JobNimbus toggle to “on”
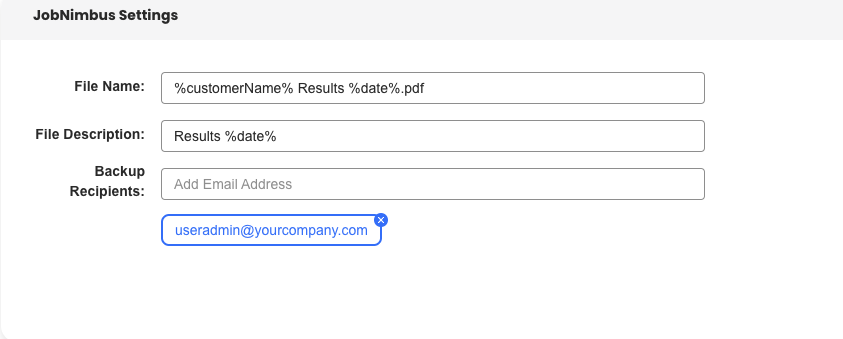
- Create a default file name by adding a File Name (e.g. %customerName% Results %date%.pdf).
- Create a default file description by adding a File Description.
- Add Backup Recipients email addresses. In the event a document fails to upload to JobNimbus, the app will send an email to all email addresses listed in Backup Recipients. This email will include the attachment that failed to upload to JobNimbus, as well as the customer information and a brief description of why it failed to upload.
- In the No Sale and Sales sections click Add once, this will create 1 row to pull in one Workflow Picker from JobNimbus.
- Add JobNimbus Customer Workflow Picker.
- Enter a Title. Example: Appointment Result.
- Change the Input Type to JobNimbus Customer Workflow Picker.
- Toggle the Required switch to make this field required.
Credit App Sending Rules
SalesPro will upload any credit applications sent from the application to JobNimbus.
- Go to Finance > Credit App Sending.
- Select JobNimbus from the API drop-down menu.
- Add a Disclosure to appear to the customer when signing the credit application.
- Add a Password to protect the credit application. Only users with the password will be able to open the credit application.
- Create a default file name by adding a File Name.
- Create a default file description by adding a File Description.
- Add Backup Recipients email addresses. In the event a document fails to upload to JobNimbus, the app will send an email to all email addresses listed in Backup Recipients. This email will include the attachment that failed to upload to JobNimbus, as well as the customer information and a brief description of why it failed to upload.