Learning how to price a roofing job accurately can make or break your business. In fact, it’s a skill that even the most experienced sales reps get wrong from time to time.
This process ensures you cover costs and materials correctly while earning a profit. Therefore, let’s dive into the specifics of roofing estimates and the steps involved in pricing a roofing job. Furthermore, we’ll discuss ways to improve your estimating process to give yourself a competitive advantage.

What is a Roofing Estimate?
A roofing estimate is a comprehensive document that outlines the scope and cost of a roofing project. It’s an essential document for both the contractor and the customer.
The estimate provides a clear picture of what to expect. For example, the key components of a roofing estimate include:
- Project Scope: Description of the work to be done. It specifies the type of roofing materials, the size of the roof, and any additional work required, such as removing old roofing or repairing damage.
- Materials: List of all the materials required for the job. It includes roofing shingles, underlayment, nails, flashing, and sealants. It should also specify the brand and quality of the materials.
- Labor Costs: Detail the hourly rates or fixed costs for the roofing crew. This also should account for any subcontractors needed.
- Timeline: The start date and estimated completion date. It should also mention any factors that could cause delays, such as weather conditions.
- Overhead Costs: Overhead costs include everything from transportation to office expenses. These are the indirect costs of running your business that need to be factored into the estimate.
- Building Codes and Permits: Some roofing jobs have specific building codes or require specific permits. This section should outline any necessary permits and the cost associated with obtaining them.
- Total Cost: Finally, the estimate should include the total cost for the project. This is the sum of all the individual costs outlined above.
Understanding these components is crucial for learning how to price a roofing job accurately. Now, let’s move on to the key steps involved in determining your pricing.
Key Steps to Price a Roofing Job
So, how do you get to the estimate? It all starts with surveying the job and determining the costs. That’s why pricing a roofing project involves several key steps.
Specifically, these steps ensure you cover all your costs and make a profit. Believe it or not, many roofing contractors struggle to create a consistent process, which often leads to inconsistent pricing.
Overall, the five key steps to price a roofing job include:
- Calculate Ground-Level Squares
- Determine the Roof Pitch and Pitch Multiplier
- Determine Labor Costs
- Calculate Overhead Costs
- Breakdown Total Pricing
Having your sales team master each of these steps is a winning recipe. In fact, it’s the best way to prevent underselling a job and protect your margins. Therefore, let’s go through each step in detail.
1. Calculate Ground-Level Squares
You won’t know how to price a roofing job accurately without calculating the number of ground-level squares. A square in standard roofing terms is a 10×10 foot area, or 100 square feet. This measurement helps determine the amount of roofing materials needed.
- Measure the Building: Start by measuring the length and width of the building at ground level.
- Calculate the Area: Multiply the length by width to get the total area of the roof in square feet. For example, if the building is 40 feet long and 30 feet wide, the total area is 1,200 square feet.
- Convert to Squares: Divide the total area by 100 to get the number of squares. In our example, 1,200 square feet divided by 100 equals 12 ground-level squares.
Measuring the ground-level squares accurately is critical for your roofing materials list and ordering. If you order the right amount of materials, then you can reduce waste and cost overruns.
2. Determine the Roof Pitch and Pitch Multiplier
The roof pitch affects the amount of materials needed and the labor involved. The pitch is the slope of the roof, usually expressed as a ratio of vertical rise to horizontal run.
- Measure the Pitch: Measure the distance from a level to the roof surface at a 12-inch horizontal run.
- Calculate the Pitch: Divide the vertical rise by the horizontal run. For example, if the rise is 6 inches and the run is 12 inches, the pitch is 6:12.
- Determine the Pitch Multiplier: The pitch multiplier adjusts the area measurement to account for the slope. Use a pitch multiplier chart to find the correct multiplier. For a 6:12 pitch, the multiplier is typically 1.12.
- Adjust the Area: Multiply the number of ground-level squares by the pitch multiplier. For our example, 12 squares multiplied by 1.12 equals 13.44 squares.
Determining the roof pitch and pitch multiplier accurately ensures you account for the extra materials and labor required for sloped roofs. If you overlook this step, there’s a higher likelihood that you won’t order enough materials to cover the job.
3. Determine Labor Costs
Labor costs are a significant part of any roofing estimate. These costs include wages for your crew and any subcontractors needed.
- Calculate Crew Wages: Determine the hourly wages. Multiply this by the number of hours the job will take. For example, if you have a crew of five and each earns $20 per hour, and the job will take 40 hours, the labor cost is $4,000.
- Include Subcontractors: If you need subcontractors for specialized tasks, include their costs. Get quotes from them and add these to your estimate.
- Account for Overtime: If the job is likely to require overtime, include this in your estimate. Overtime rates are usually higher, so factor this in to avoid cost overruns.
Accurately determining labor costs covers your payroll and avoids underestimating the project’s cost. As you can, pricing a roofing job is much more than just the materials you are offering.
4. Calculate Overhead Costs
Overhead costs are the indirect costs of running your business. For instance, these include everything from transportation to office expenses.
- List Overhead Expenses: Identify all your overhead expenses. These can include vehicle costs, office rent, utilities, and insurance.
- Calculate Monthly Overhead: Add up all your overhead expenses to get a monthly total. For example, if your total overhead is $5,000 per month, this needs to be factored into your estimates.
- Allocate Overhead to Projects: Determine how much of your monthly overhead each project should cover. For example, if you do 10 projects a month, each project should cover $500 of overhead.
Calculating overhead costs is one of the most overlooked steps. However, it accurately ensures you cover all your expenses and protects the long-term health of your business.
5. Breakdown of Total Pricing
Breaking down the total pricing helps customers understand where their money is going. Moreover, it provides transparency and builds trust.
- List All Costs: Breakdown the estimate into all the individual costs. Include materials, labor, overhead, permits, and any other costs.
- Provide Subtotals: For each category, provide a subtotal. For example, list the total cost of materials, the total labor cost, and the total overhead cost.
- Add Taxes: If applicable, add sales tax or any other relevant taxes to the estimate. Make sure to check local regulations for tax requirements.
- Provide a Grand Total: Sum all the subtotals to provide a grand total for the project. Ensure this total is clear and easy to understand.
Breaking down the total pricing helps customers see the value in your services. Additionally, it reduces the likelihood of disputes over costs.
Other Information to Include in a Roofing Estimate
Including additional information in your roofing estimate can set you apart from competitors. It can also ensure the project runs smoothly.
Some information can be left for the contract, but it doesn’t hurt to provide clarity. These details can include warranties, cleanup and disposal, building codes, company branding, payment schedule, and contract information.
Adding this information to your estimate ensures all aspects of the job are covered and can prevent misunderstandings later. In addition, many of these details are necessary for the contract phase of sales, so it doesn’t hurt to get a head start.
Improving Your Pricing Control
To improve your pricing control, it’s important to invest in the right tools and software. This can streamline the entire process and guarantee accuracy.
Use software that helps control pricing by automating calculations. This can include databases of material costs and labor rates. It ensures your estimates are based on current prices. It also confirms that you aren’t selling products that are no longer in stock.
The right software can also help you manage customer interactions and follow-ups. This can help convert estimates into actual jobs that help to grow your business.
And regularly train your staff on how to use these tools. Training ensures everyone is on the same page and can use the software effectively.
Investing in the right tools and training can significantly improve the accuracy and professionalism of your roofing estimates. It’s a sure-fire way to become more efficient and collaborate as a business.
Control Your Pricing with Leap SalesPro
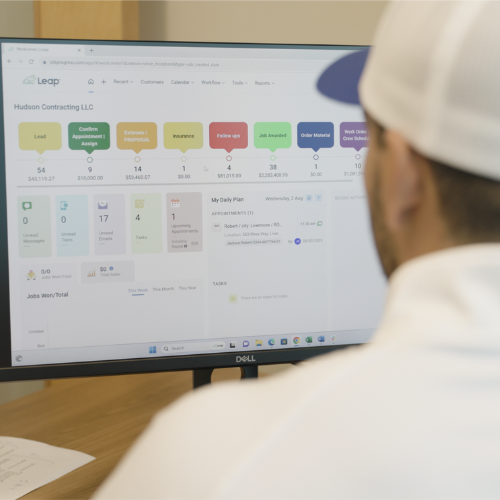
Finding the right software can be a game-changer for your business. And with Leap SalesPro, you get comprehensive features that cover all aspects of roofing estimates and the sales process.
Leap SalesPro provides tools for accurate pricing control with guardrails to ensure no line item is overlooked or underpriced. This guarantees that your estimates are always based on the latest prices.
The software also offers robust sales management features. It helps you track customer interactions and follow-up on estimates.
Training your staff to use Leap SalesPro is straightforward as well. The software is user-friendly and comes with excellent customer support. This ensures your team can quickly get up to speed and start using the software effectively.
The team at Leap also understands the value of integrating with your current systems. Leap SalesPro provides industry-leading partner integrations that includes measurement tools, lending, and more.
Now that you know how to price a roofing job accurately, you need the right tools to streamline the entire process. To learn how Leap SalesPro can transform your roofing business, fill out the form below and schedule a quick demo!
Frequently Asked Questions
Leap SalesPro streamlines roof estimating with easy input features, calculations, and guardrails to prevent common paper errors. It also comes with contract linking so you can quickly turn your estimates and proposals into sign-able contracts.
An experienced sales representative should prepare the estimate with any insights from management, customers, and other stakeholders, such as subcontractors, if necessary.
With Leap SalesPro, you can quickly generate precise, professional, and modern estimates that are more efficient and effective than paper estimates. This will prevent you from underselling a job that cuts into your margins.


